Sales and contacts
Relation with the exercise book
This chapter matches Steps 2 and 6 of the exercise book: setting up the customer contacts and first quotations and sales. It gives you the concepts you need to handle your contacts and the whole sales cycle, from quotation through to delivery of the goods.
Handling contacts
Introduction to contacts
In Odoo, contacts gather all your business partners: customers, prospects, vendors, employees and so on. Keeping them in one place maintains a single consistent database for every application.
Note
The same contact can hold several roles at once: being both a customer and a vendor, for instance.
Types of contact
Companies and individuals. Odoo distinguishes two main types of contact:
- Companies: legal entities (businesses, associations, institutions and so on).
- Individuals: natural persons.
Individuals can be attached to a company, which builds a hierarchy of contacts, useful for handling the different people within the same organisation.
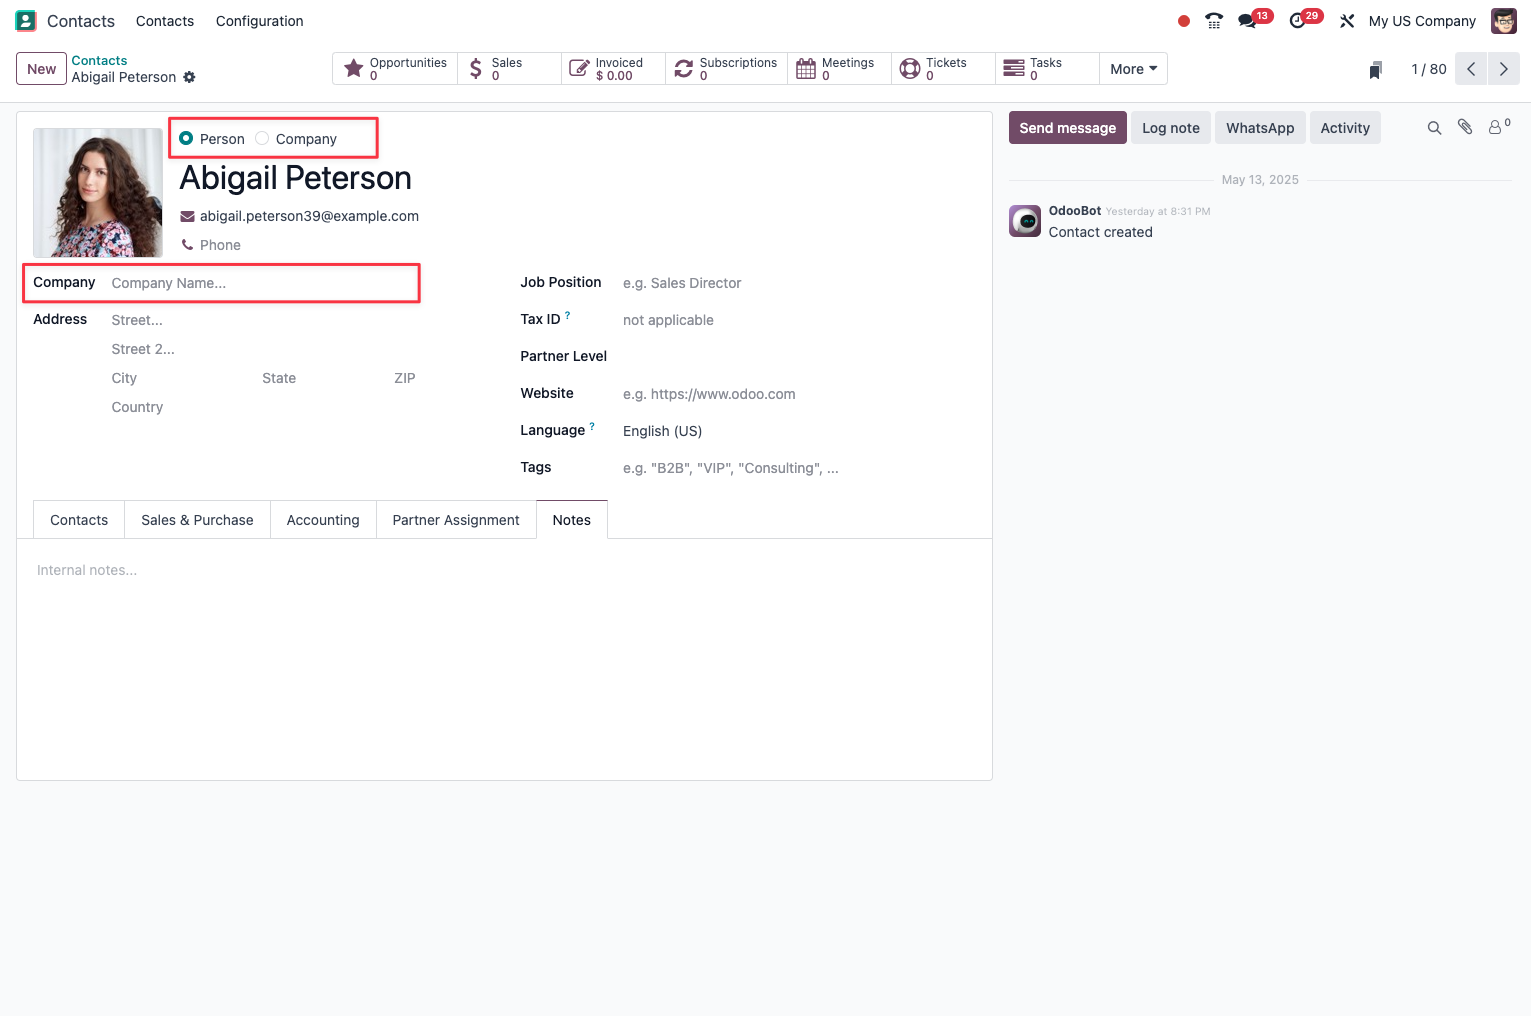
Partner categories. Contacts can be classified by their role in your business:
- Customers: partners who buy your products or services.
- Vendors: partners you buy from.
- Prospects: potential customers not yet converted.
- Other: any other partner you need (banks, public bodies and so on).
Tip
In Odoo, the customer/vendor classification works through an automatic ranking system. There is
no "is a customer" or "is a vendor" checkbox. Instead Odoo uses customer_rank and
supplier_rank fields which rise on their own:
- when you create a customer invoice, the customer rank rises;
- when you create a vendor bill, the supplier rank rises;
- the higher the rank, the earlier the partner appears in the lists.
Creating and editing contacts
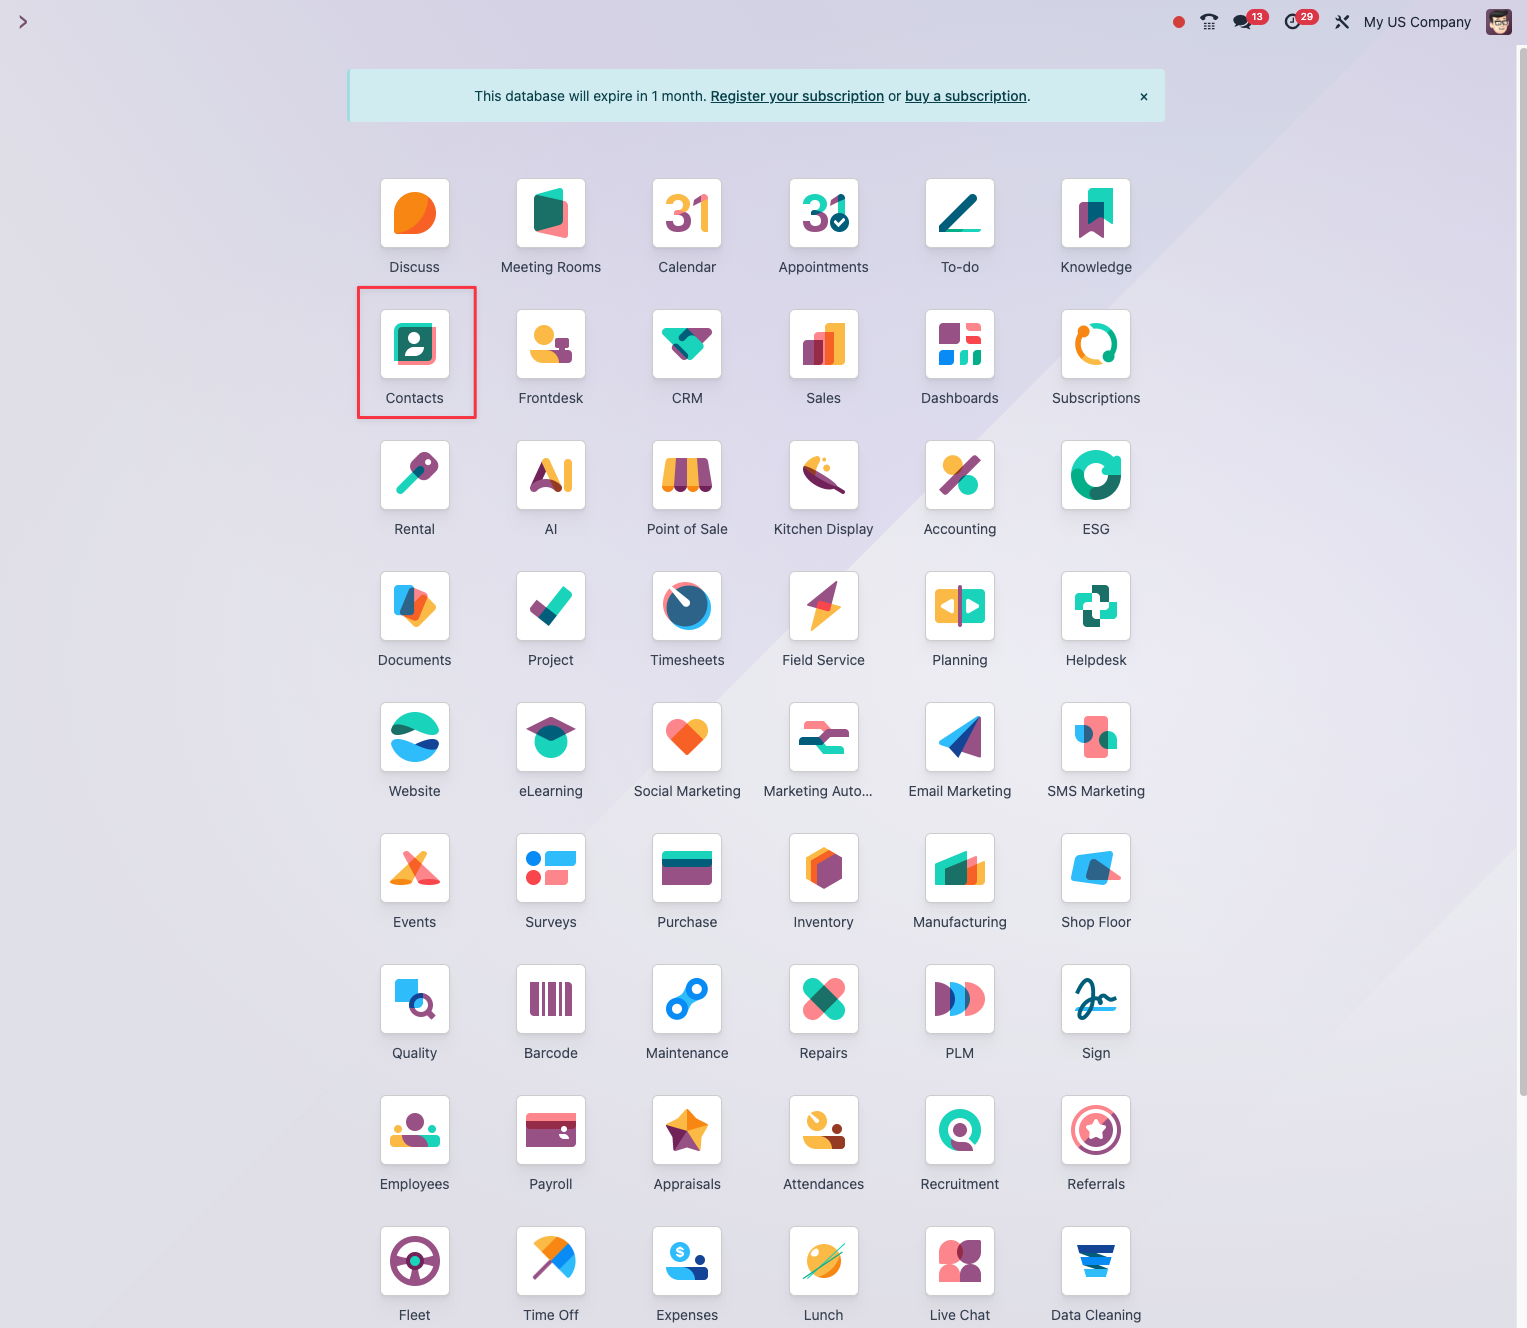
Reaching the Contacts module. To handle your contacts:
- Click the Contacts application in the main menu.
- Or reach it from any application through the application switcher.
Creating a new contact. To add a new contact:
- In the Contacts application, click Create.
- Choose the type of contact: company or individual.
- Fill in the basic information: - the name, that is the registered name for a company; - the full address: street, city, postcode, country; - the contact details: phone, mobile, email; - the website, for a company.
- If needed, set the status: customer and/or vendor.
- Add tags to classify the contact.
- Click Save.
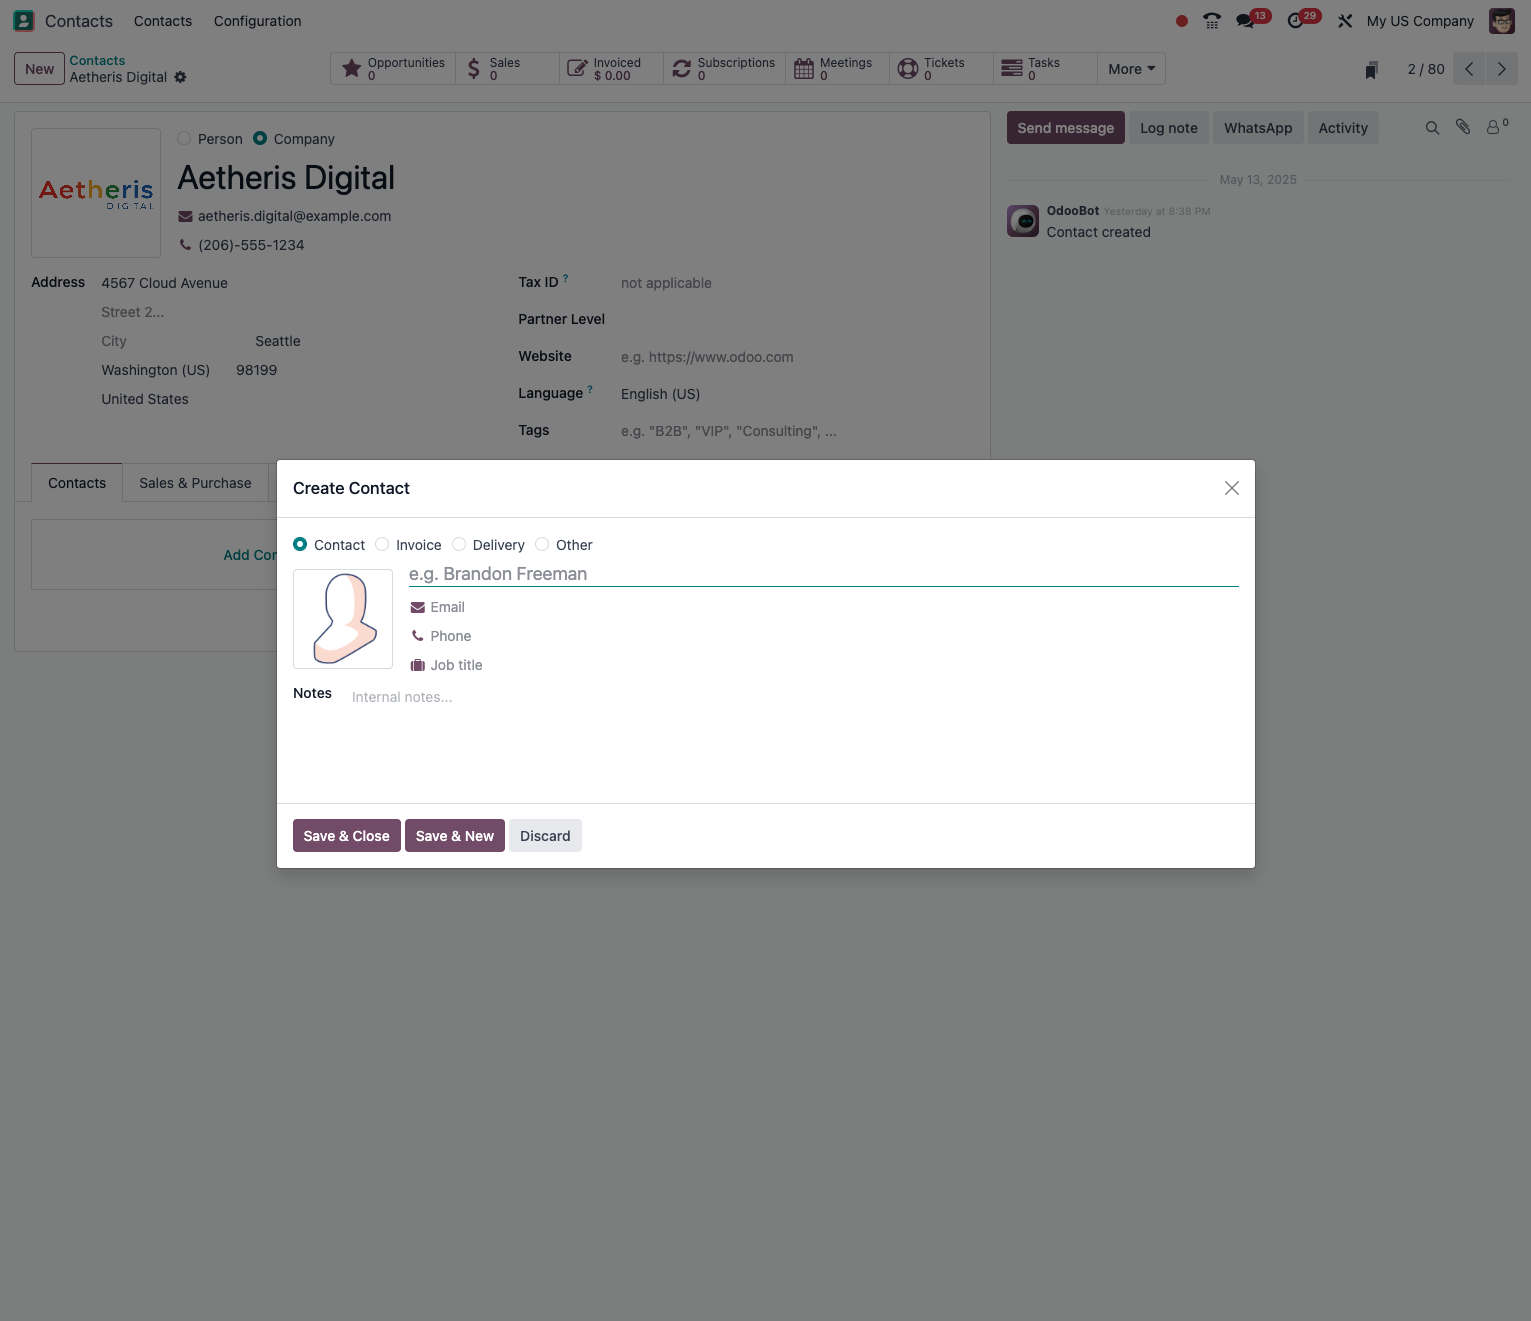
Adding a contact attached to a company. To create an individual contact attached to a company:
- Open the company record.
- Go to the Contacts & Addresses tab.
- Click Add.
- Fill in the contact's information: - first name and surname; - job position in the company; - direct contact details: phone, email.
- Click Save & Close.
Note
Contacts attached to a company inherit its address by default, but you can state a different address where needed.
Editing an existing contact. To update a contact's information:
- Find the contact in the list, or use the search bar.
- Click their name to open the record.
- Click the Edit button.
- Make the changes needed.
- Click Save.
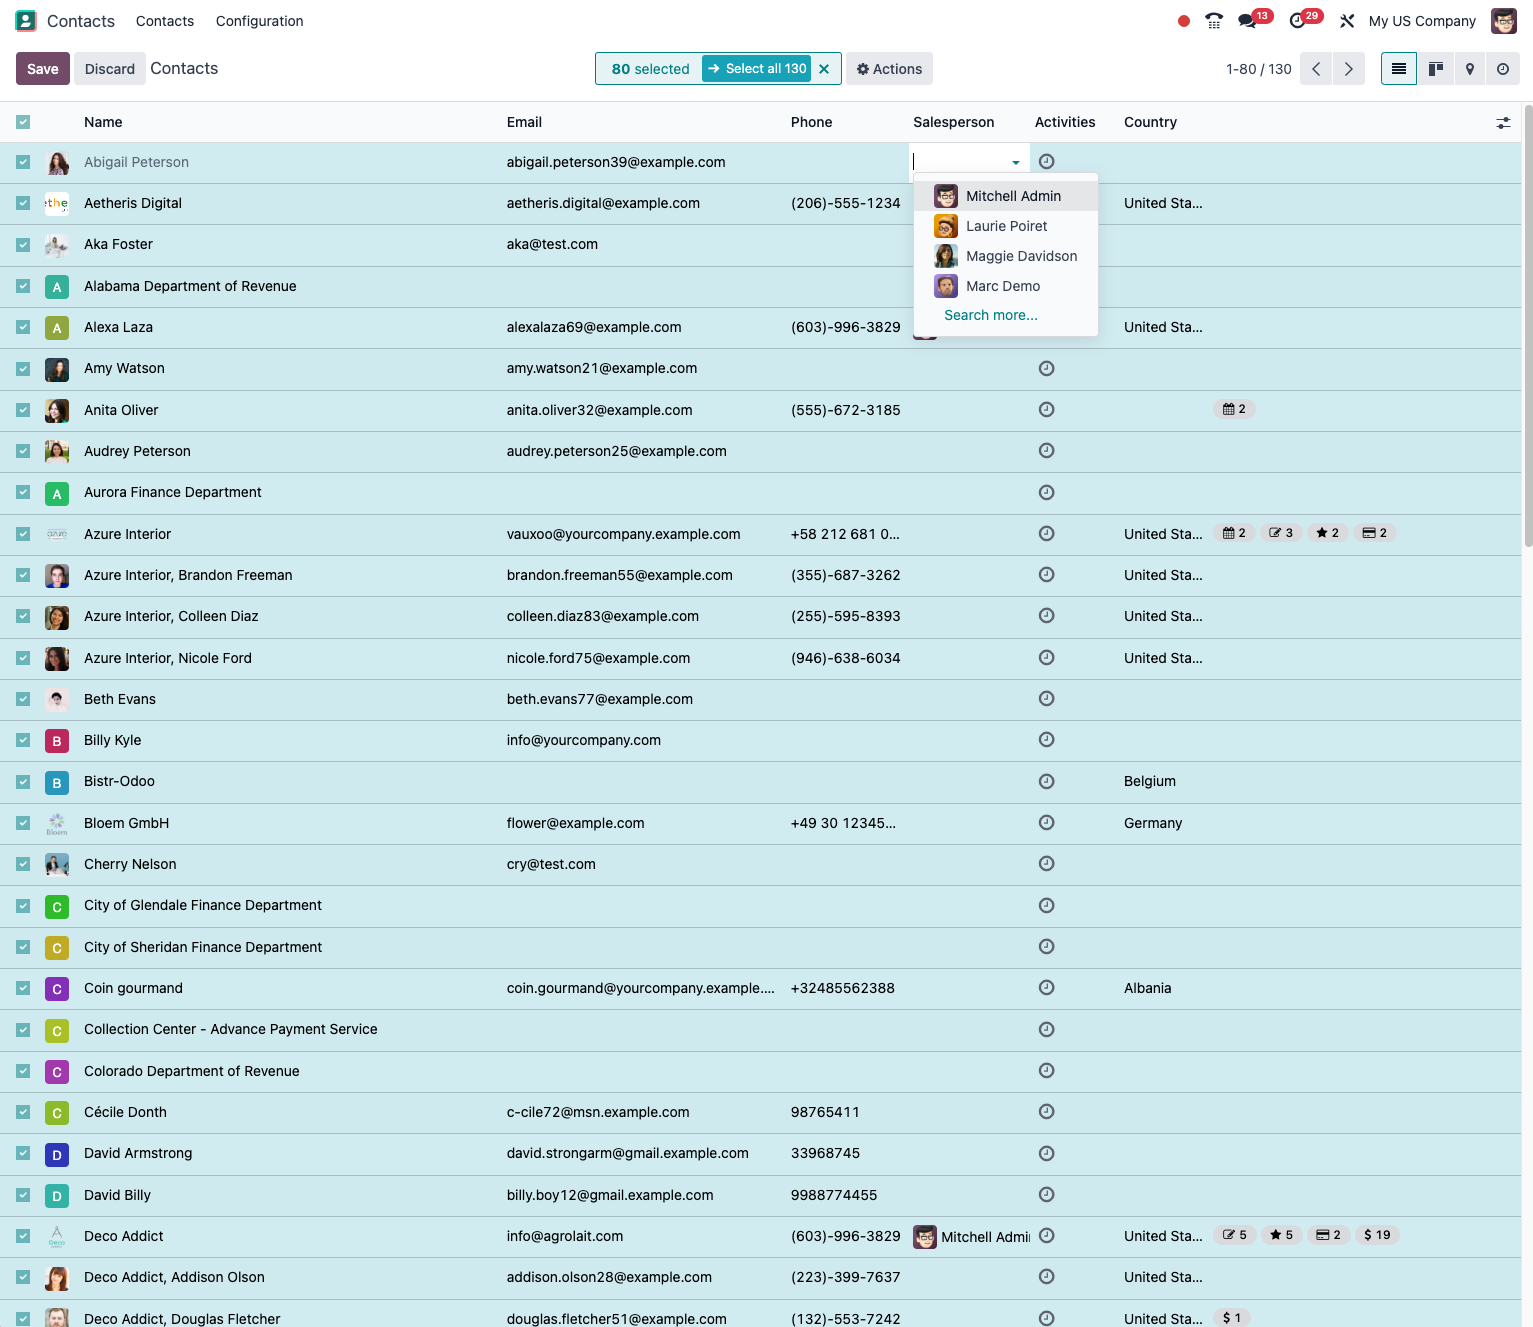
To edit several contacts at once:
- In list view, select the contacts to edit by ticking their boxes.
- Click the first row of the list in the column to change.
- Change the value of the column: the change applies to every contact selected.
- Click Save.
Introduction to sales in Odoo
Odoo's Sales module handles the whole sales cycle, from quotation through to invoicing, by way of the order and the delivery. This chapter details the main steps of the sales process and explains how to use those features effectively day to day.
Note
The standard sales process in Odoo generally follows this sequence: quotation, confirmed order, delivery, invoice, payment.
Initial configuration
Sales settings
To configure the Sales module to suit your needs:
- Open Sales › Configuration › Settings.
- Configure the main options: - Quotations: numbering format, default validity period. - Team management: enabling sales teams. - Electronic signature: for online acceptance of quotations. - Online Payment: to let customers pay straight from the quotation.
- Advanced options: - Variants: to handle different versions of the same item. - Units of Measure: to sell in different units (pieces, kg, boxes and so on). - Pricing: multiple pricelists, discounts and so on.
- Click Save to apply the settings.
Sales teams
To organise your sales force:
- Open Sales › Configuration › Sales Teams.
- Create or edit the teams to suit your needs: - the team name: by region, product or customer segment; - the team leader; - the team members; - the sales targets.
- Each salesperson can belong to one or several teams.
Tip
Defining sales teams organises the sales work better and makes it easier to analyse performance by segment of activity.
Quotations
Creating a new quotation
To create a new quotation in Odoo:
- Open the Sales module.
- Click Quotations in the side menu.
- Click the Create button.
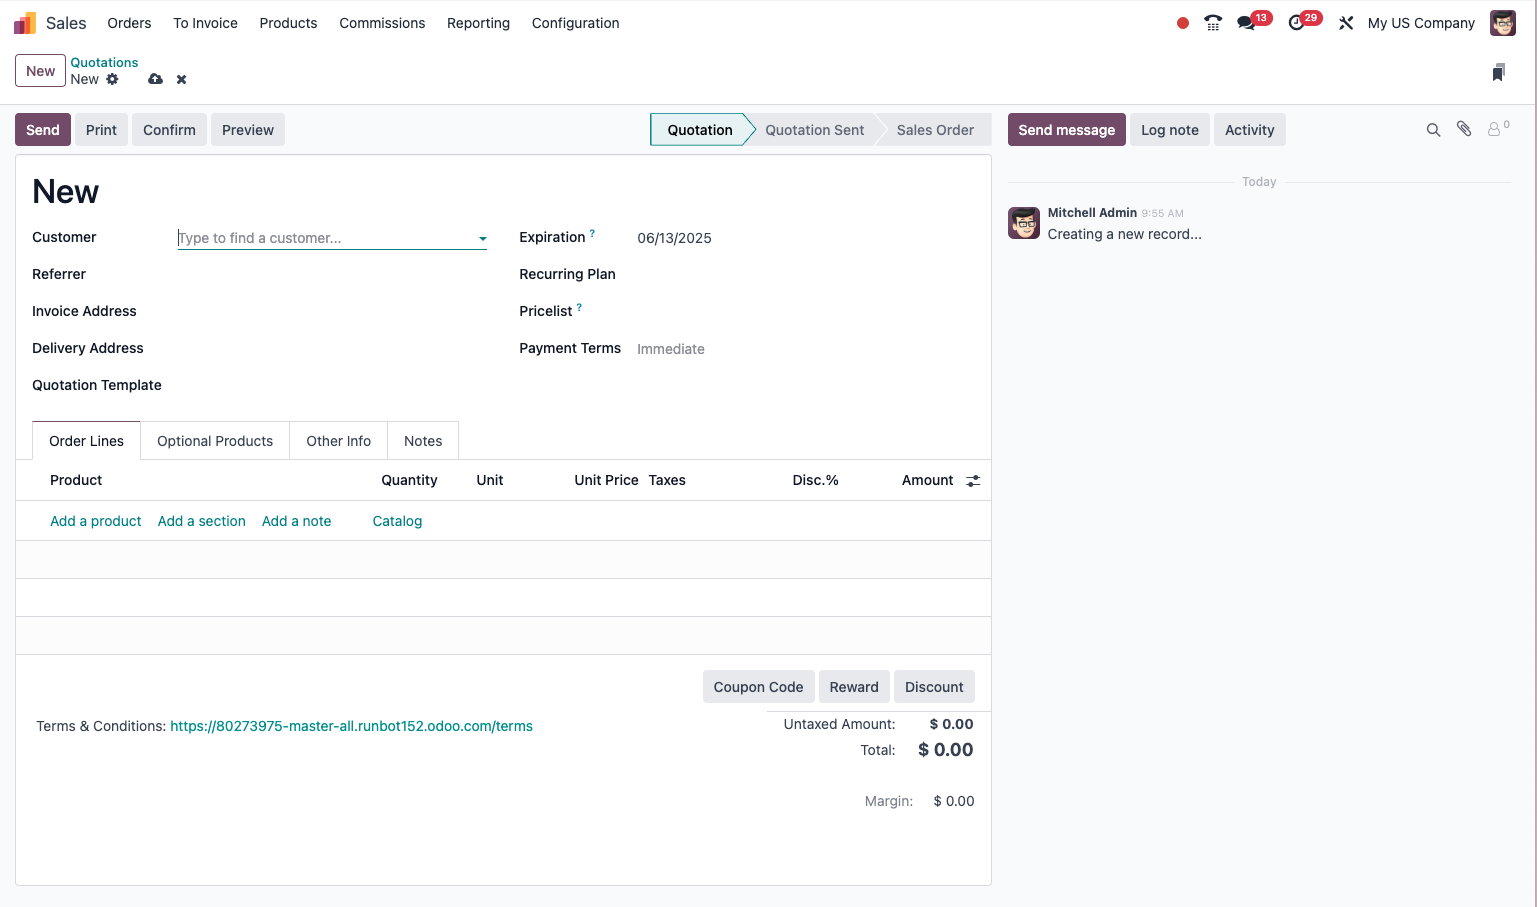
- Fill in the information of the quotation: - select the customer, or create a new one; - check the expiration date; - choose the sales team and the salesperson responsible; - add the product lines by clicking Add a product; - for each line, state the quantity and check the price; - apply discounts where needed.
- Check the payment and delivery terms.
- Click Save.
Tip
To create similar quotations quickly, use the Duplicate option on an existing quotation, then change only the information that differs.
Using quotation templates
Note
Quotation templates require the "Sales Management" module (sale_management), which
extends the base Sale module. The feature is not available with the Sale module alone.
Quotation templates save time by preconfiguring standard offers.
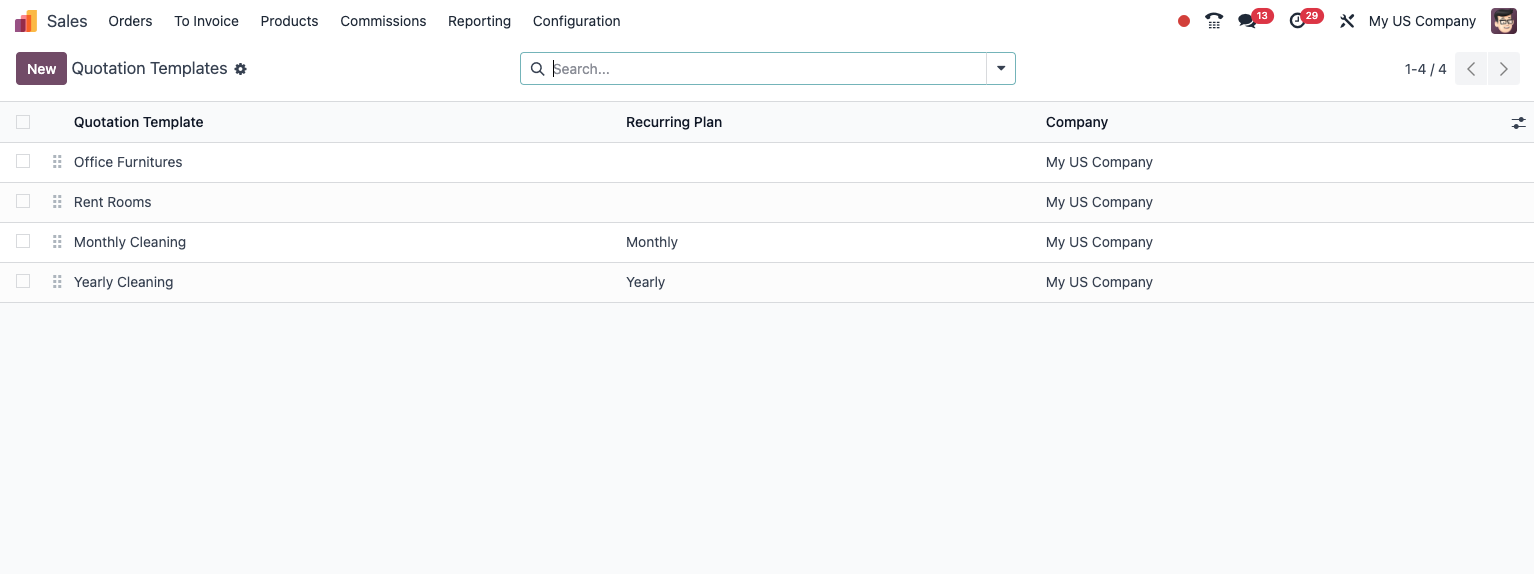
- Open Sales › Configuration › Sales Orders › Quotation Templates.
- Click Create to define a new template.
- Give the template a name.
- Add the products you generally include.
- Configure the default validity, payment and delivery options.
- Save the template.
To use a template when creating a quotation:
- On a new quotation, click Use Template.
- Select the template you want.
- The quotation is pre-filled with the information of the template.
- Adapt the detail where needed.
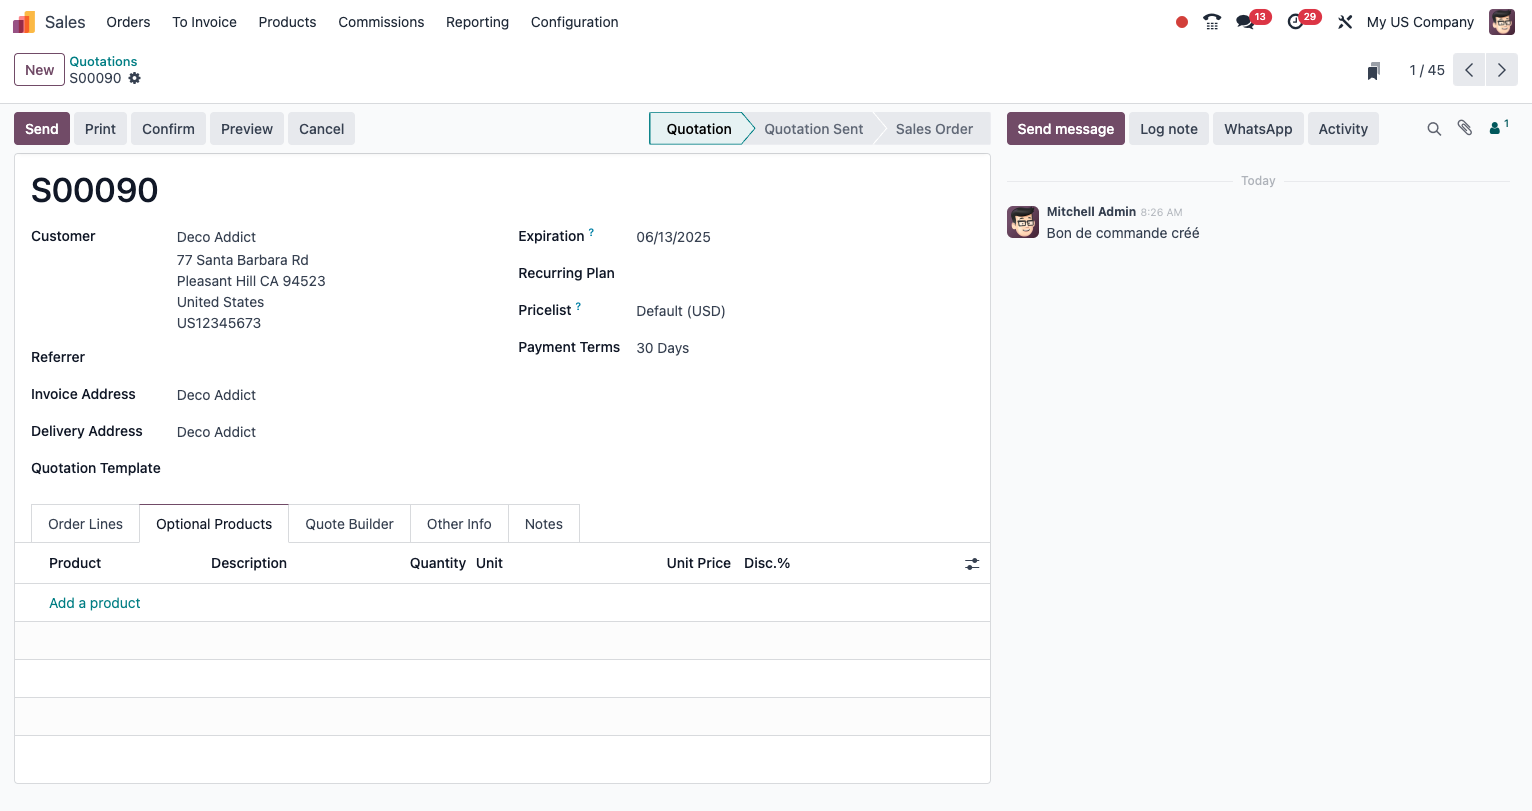
Add optional products to your quotations to offer extras or alternatives:
- On a quotation, go to the Optional Products tab.
- Click Add a line to include an optional product.
- State the quantity and the price.
When the customer views the quotation online, they can select the options they want to add to their order.
Sending the quotation to the customer
Once the quotation is created, you can send it to the customer:
- Click the send-by-email button.
- Check and personalise the message where needed.
- Click Send.
You can also:
- click Print to produce a PDF of the quotation;
- use the Share option to obtain a link you can send to the customer.
Note
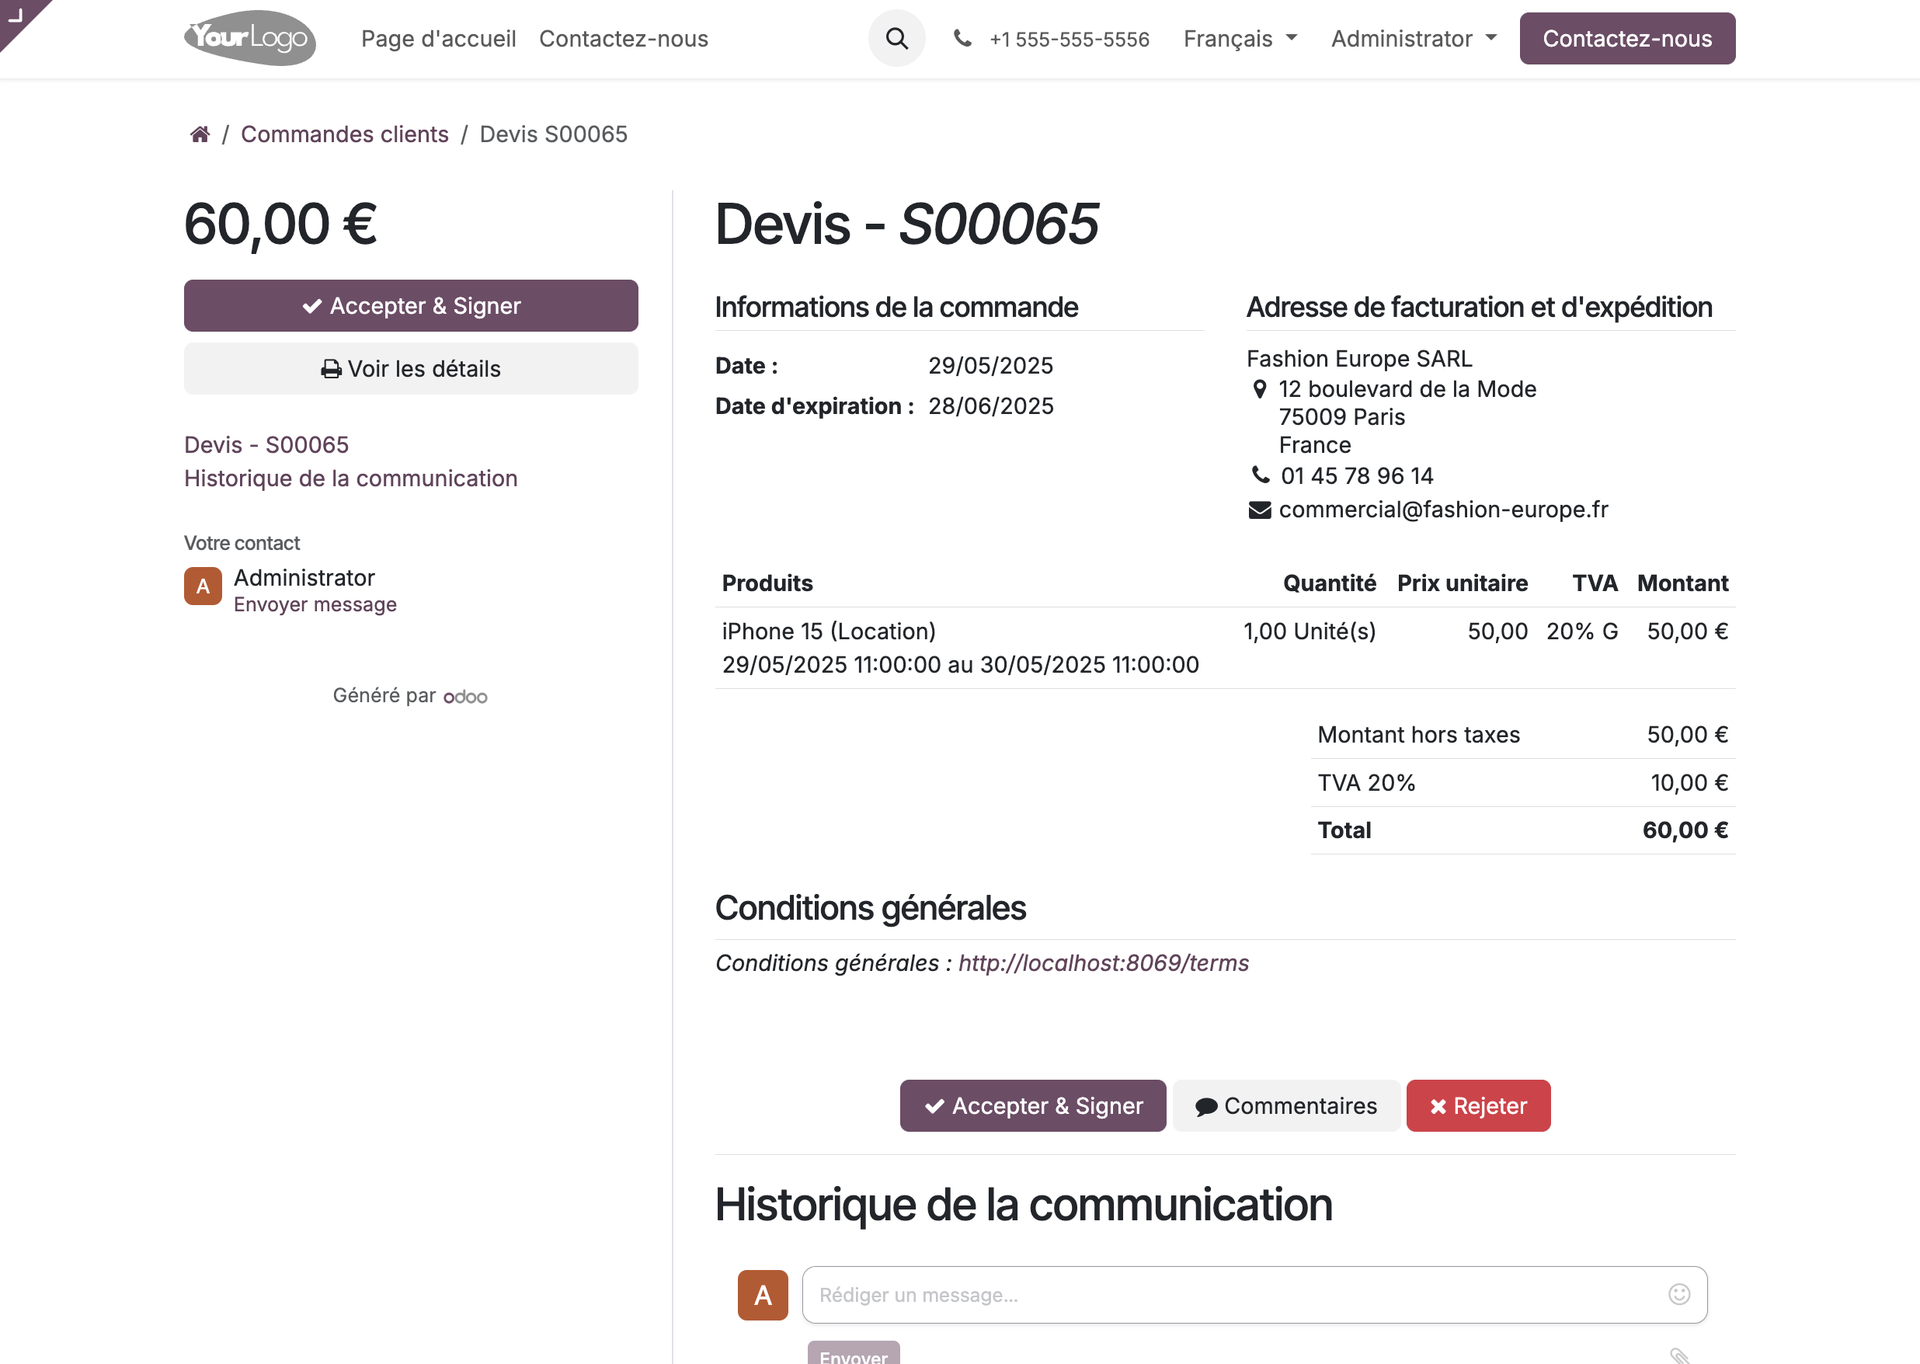
The customer can accept the quotation online, either by signing it electronically or by paying online, when those options are enabled.
Sales orders
Converting a quotation into an order
When a customer accepts a quotation, you turn it into a firm order:
- Open the quotation concerned.
- Click the Confirm button.
- The quotation becomes an order, and the number changes format.
- The status moves to Sales Order.
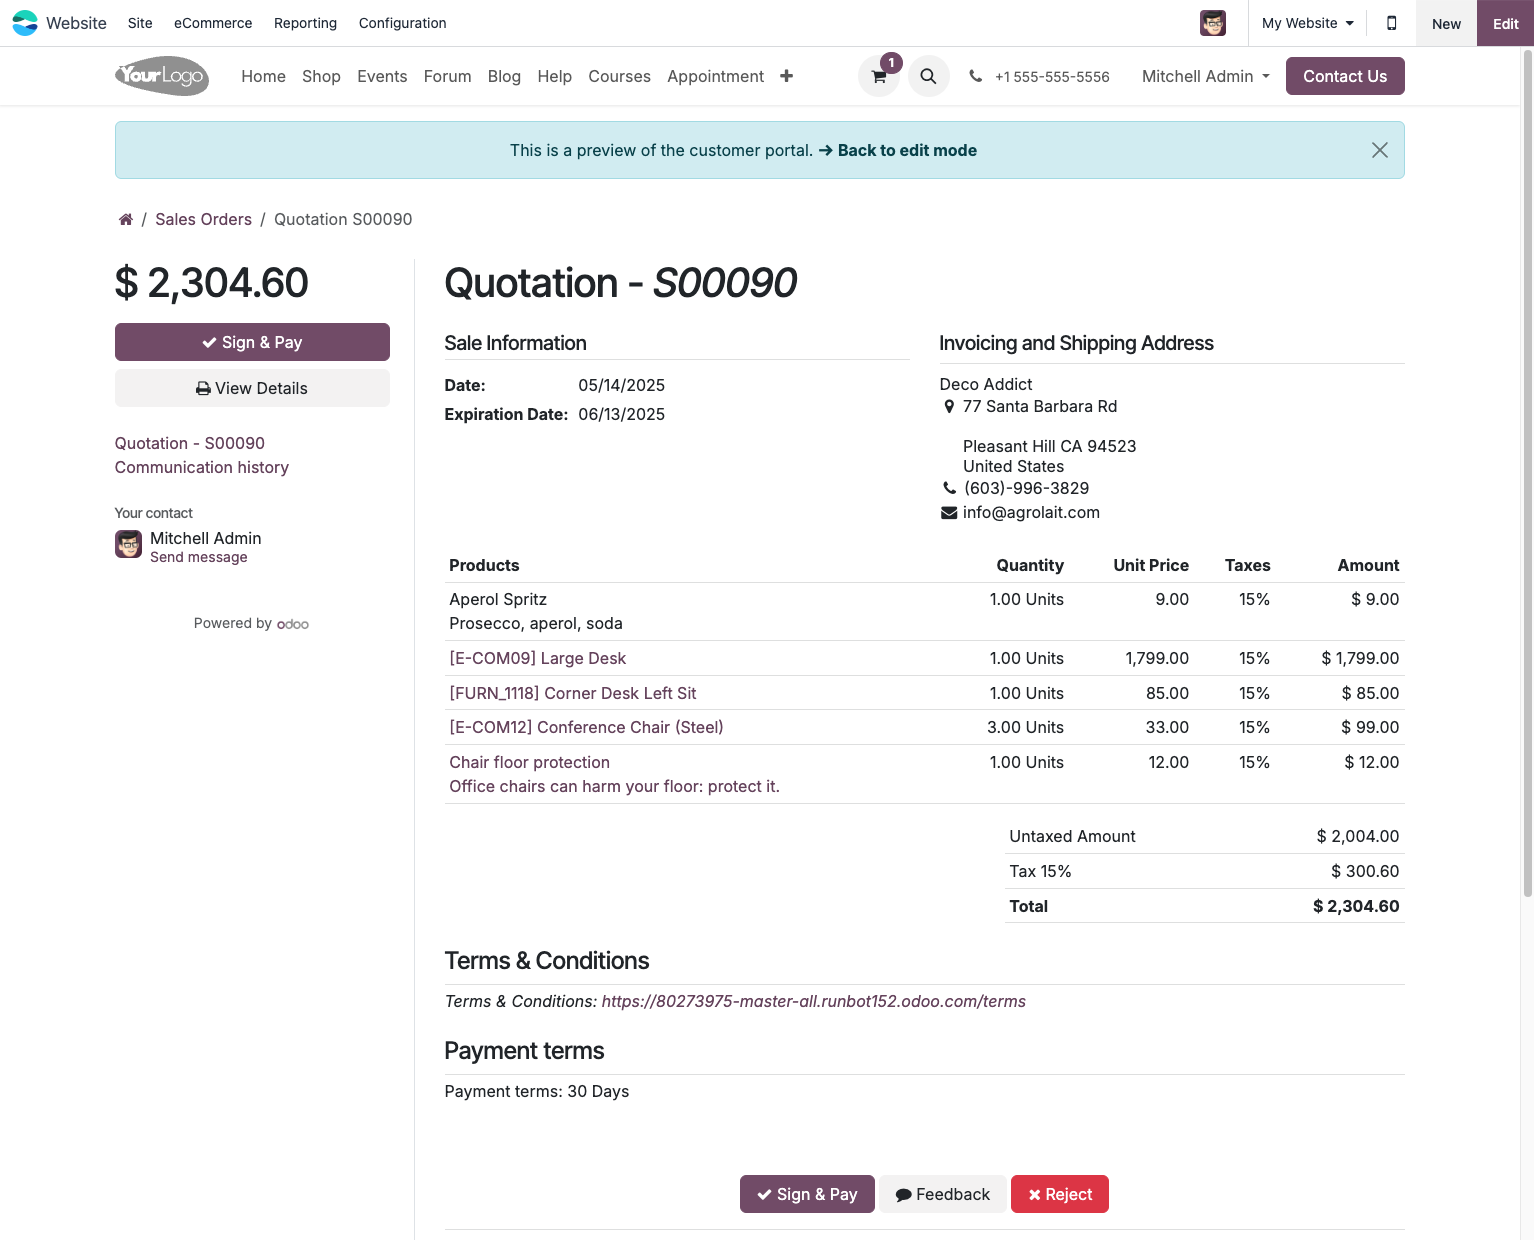
If you have enabled online signature or online payment:
- the customer can confirm the quotation straight from the customer portal;
- once it is signed or paid, depending on your settings, the quotation is converted into an order automatically;
- a notification tells you of that conversion.
Editing an order
Even after confirmation you may sometimes need to change an order:
- Open the order concerned.
- Click Edit.
- Make the changes needed.
- Click Save.
Tip
Whether an order can be changed after confirmation depends on how far the delivery and invoicing have progressed. If products have already been delivered or invoiced, some changes may be impossible or may call for extra steps.
Delivering the products
Creating a delivery order
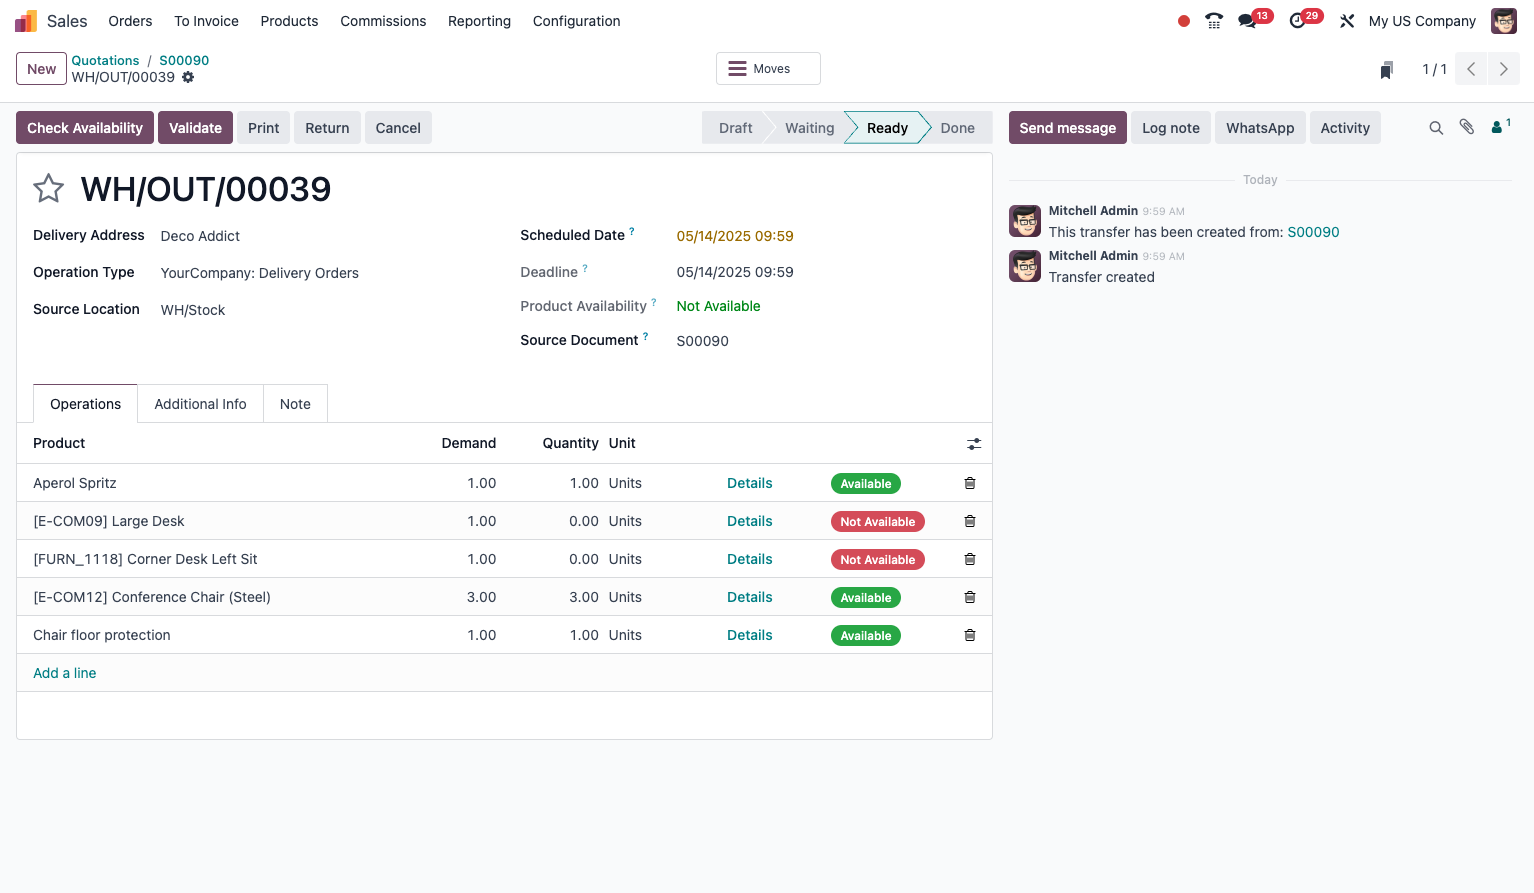
Once the order is confirmed, Odoo creates a delivery order automatically:
- On the order, click the Delivery smart button.
- You are taken to the matching delivery order.
- Check the quantities and the products to deliver.
- If everything is right, click Validate to confirm the delivery.
- The status of the transfer moves to "Done".
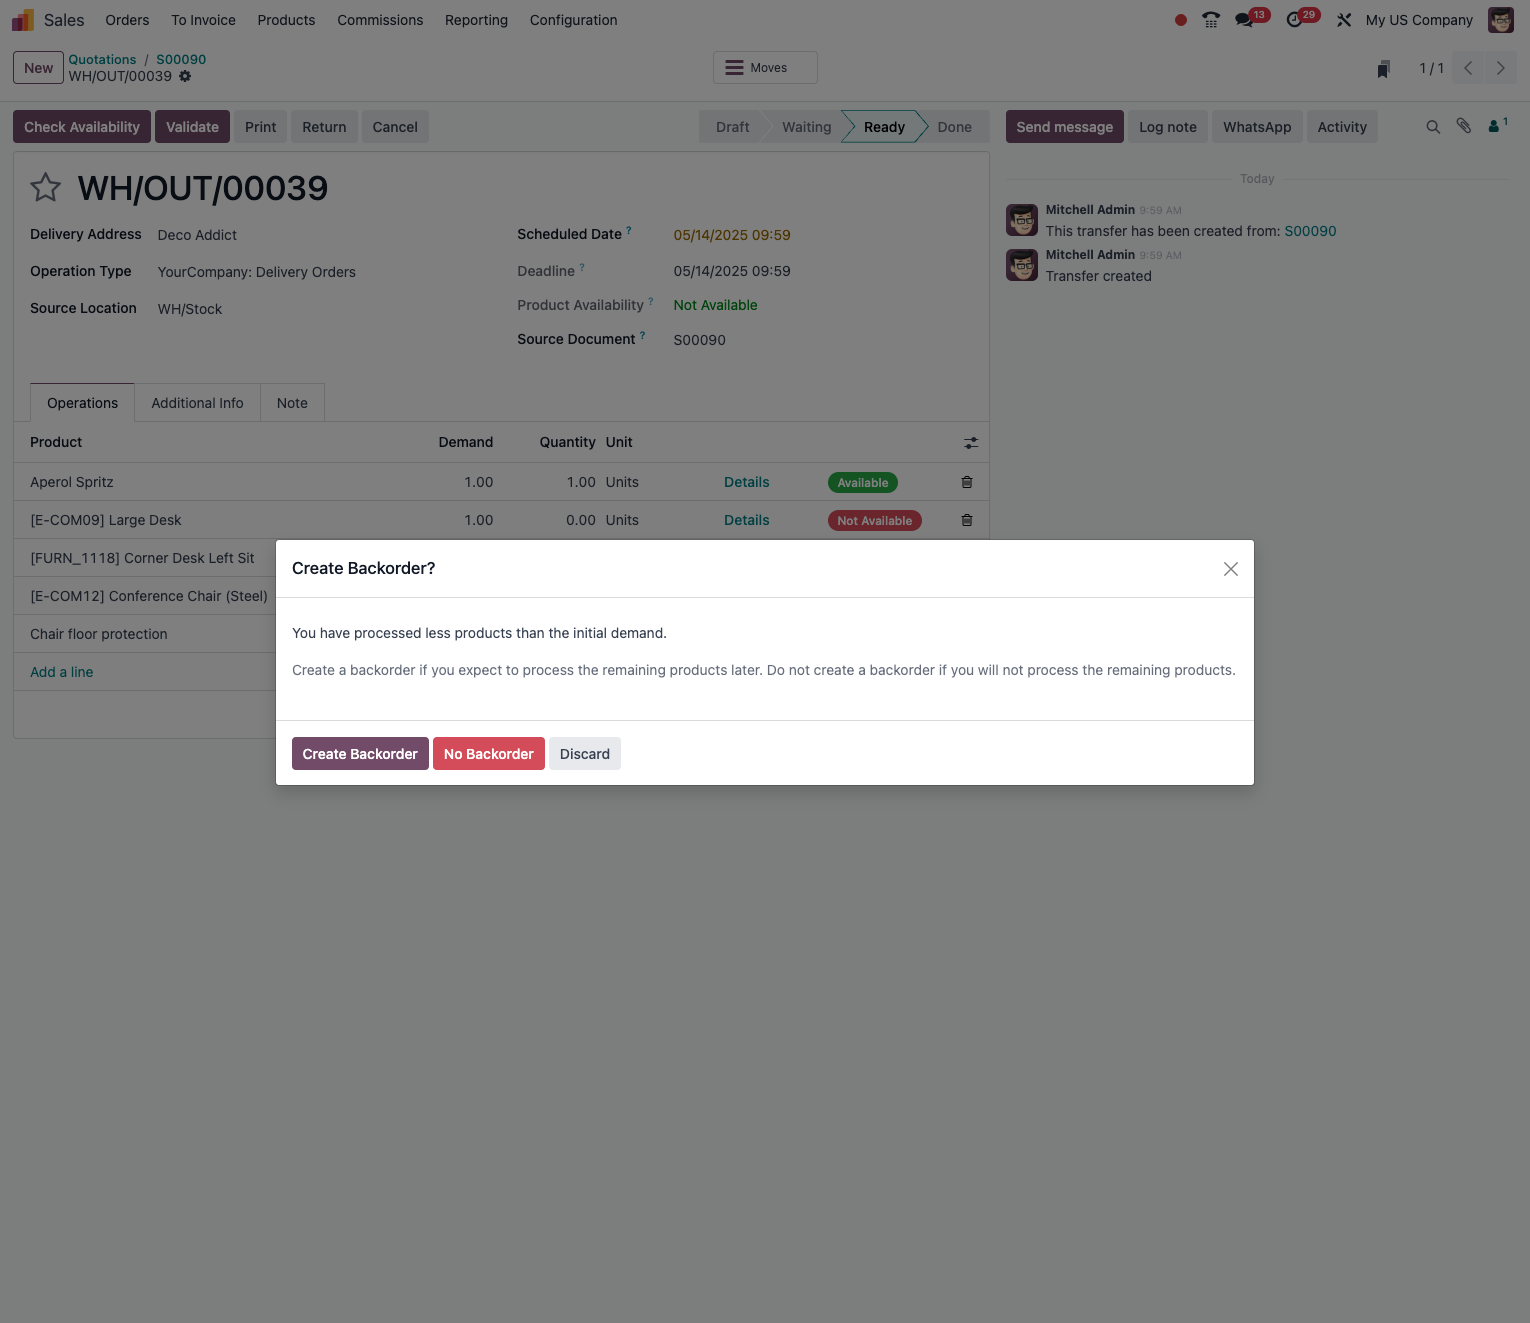
If you can deliver only part of the order:
- On the delivery order, change the Done quantities to reflect what you are actually delivering.
- Click Validate.
- Odoo automatically creates a new delivery order for the quantities outstanding.
Printing the delivery note
To print the delivery note:
- On the delivery order, click Print.
- Select Delivery Slip.
- The PDF opens in a new window.
- Print or save the document as you need.
Pricing and discounts
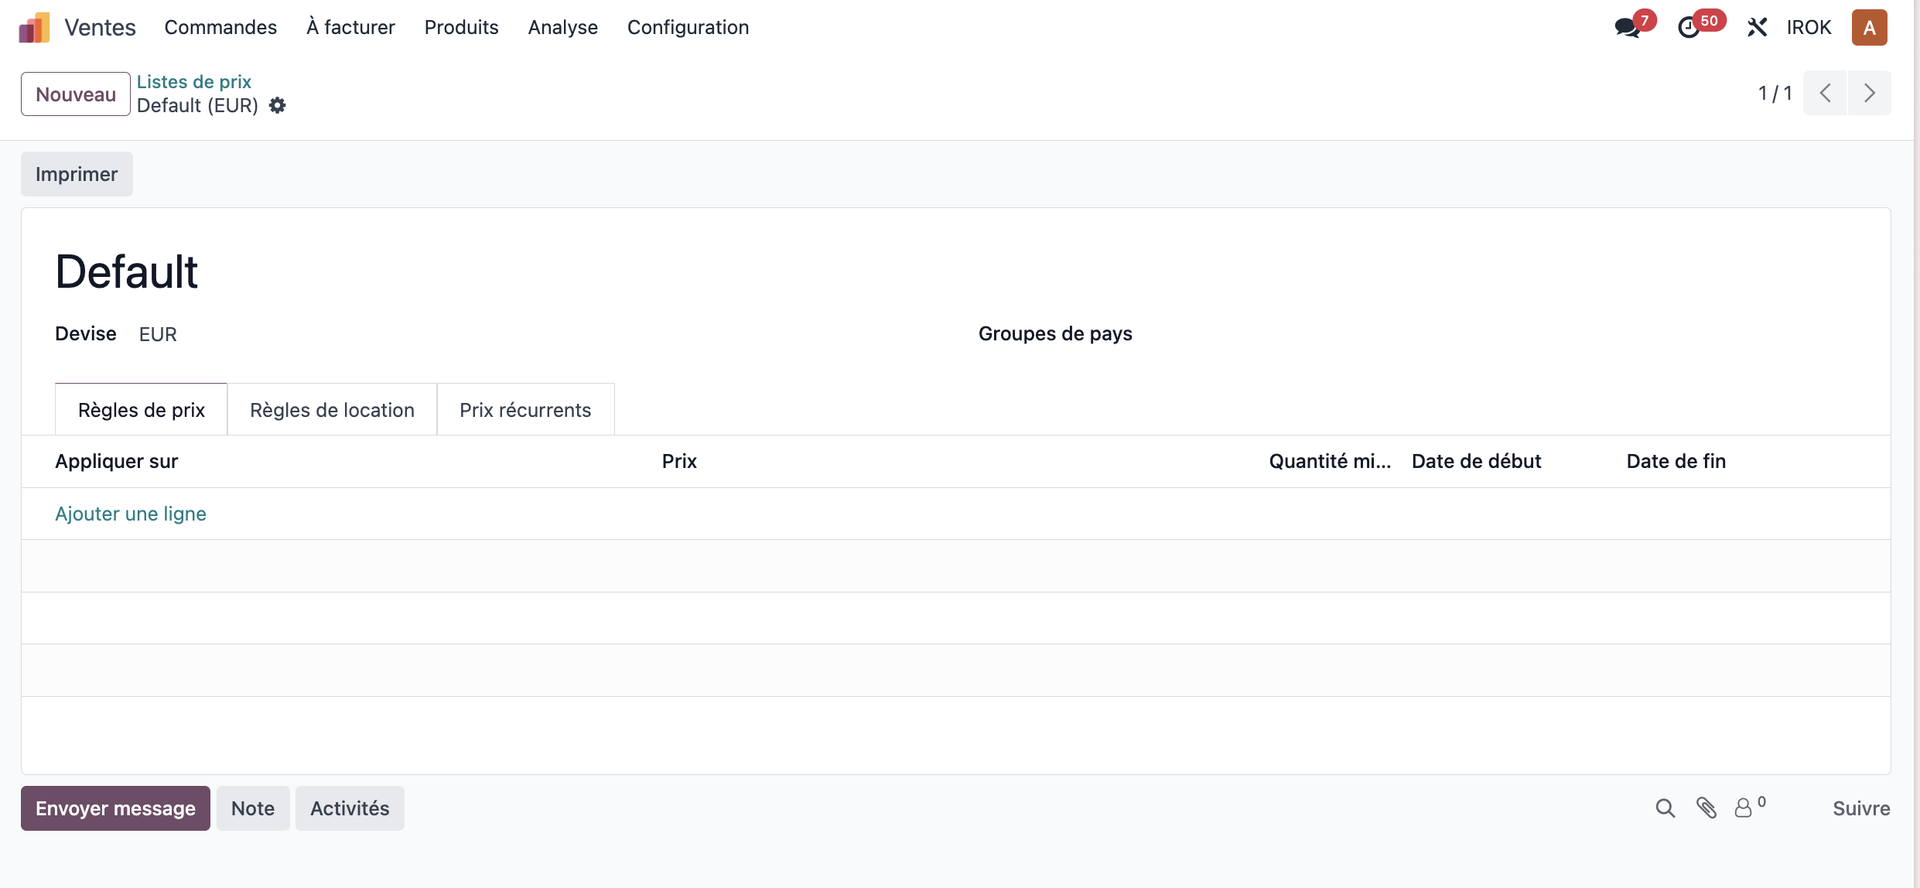
Pricelists
To handle different price structures:
- Open Sales › Products › Pricelists.
- Create the pricelists that suit your market segments: - list prices; - reseller prices; - key account prices; - promotional prices.
- For each list, define: - the currency it applies in; - the calculation rules; - the conditions under which it applies: quantities, period and so on.
Discounts
To apply discounts on your quotations:
- Line discount: enter a percentage directly in the discount column of a product line.
- Global discount: in the "Other Info" tab, apply a discount on the total.
- Automatic discounts: through the pricelists, configure rules based on: - the quantities ordered; - the total amount of the order; - the product category; - a specific customer.
Tip
Quantity discounts encourage your customers to increase their order volumes. They are an effective upselling tool.
Sales analysis
The sales dashboard
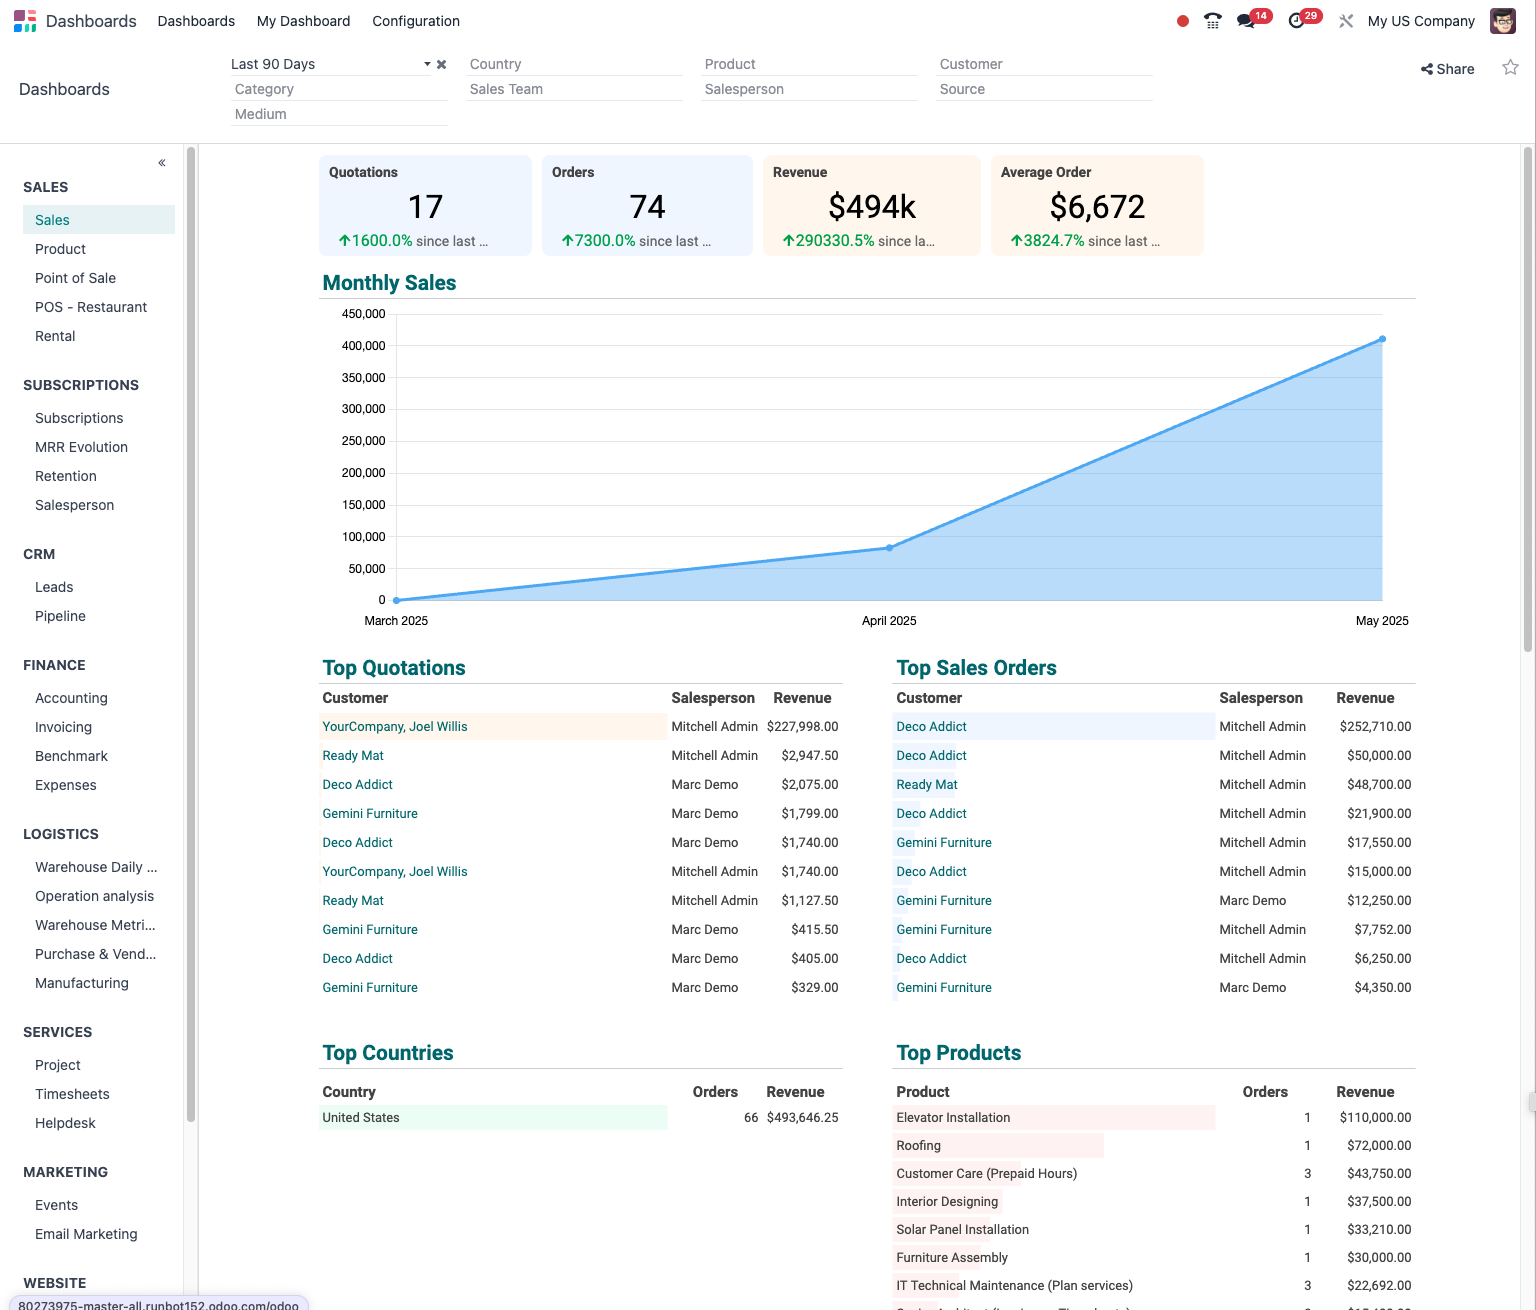
Odoo offers a complete dashboard for analysing your sales performance:
- Open the sales reporting dashboard.
- See your key indicators: value of quotations, orders, revenue and so on.
- Use the filters to refine the analysis by period, team, product and so on.
Detailed reports
For deeper analysis:
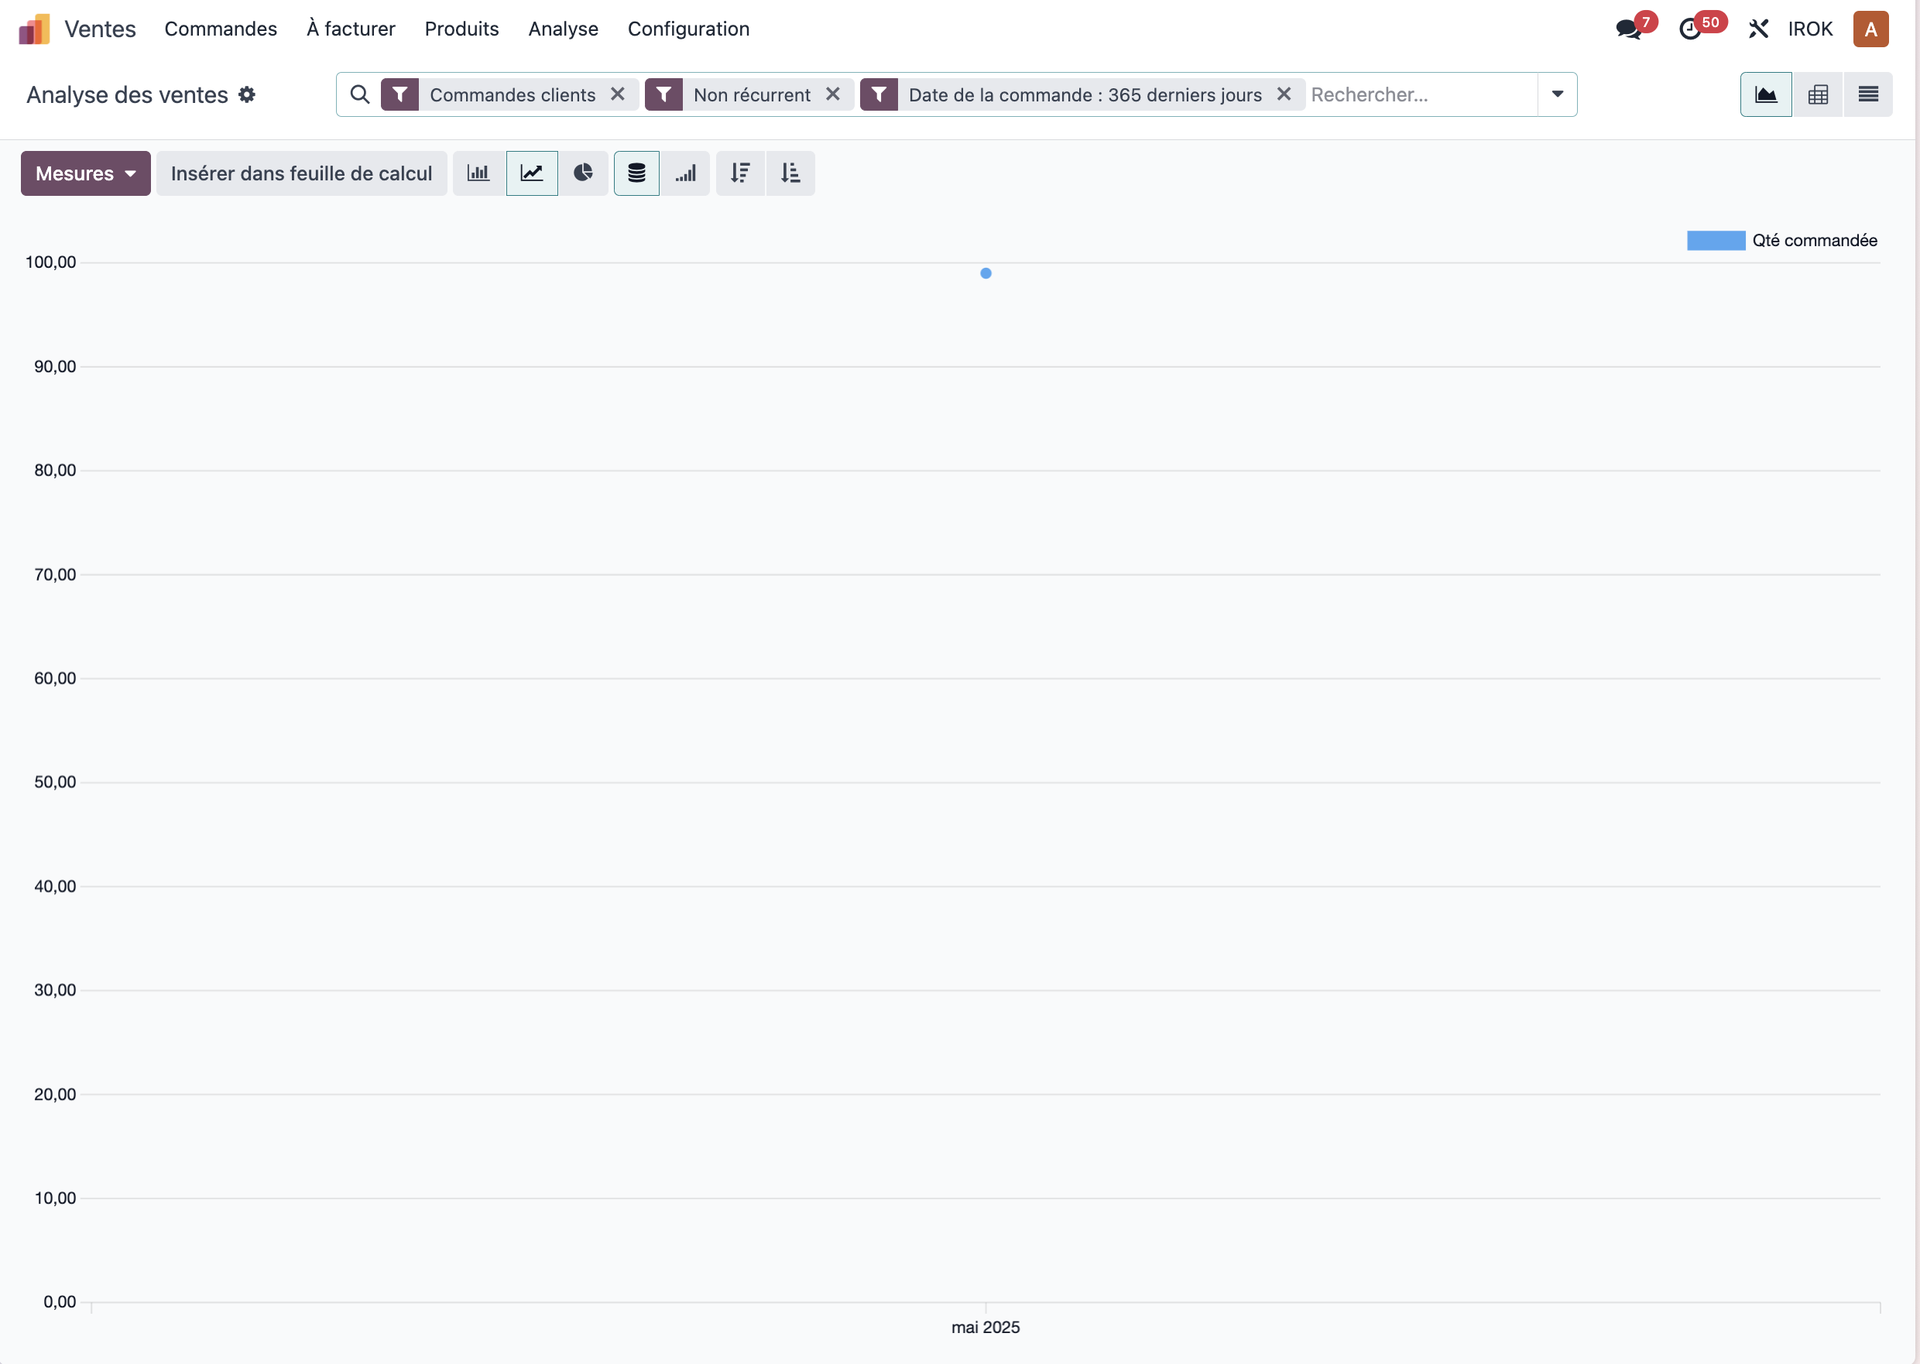
- Open Sales › Reporting › Sales.
- Choose the type of report you want: by customer, product, salesperson and so on.
- Use the filters and groupings to tailor your analysis.
- Click Measures to select the indicators to display.
- Export the data to CSV or XLS where needed.
Tip
Use the Favorites option to save your custom reports and reach them quickly afterwards.
Handling sales targets
Setting the targets
To steer the performance of your teams:
- Open the sales configuration and create a target, stating: - the period concerned; - the team or the salesperson targeted; - the amount or the number of sales to reach; - the type of target: revenue, margin, new customers and so on.
- Follow progress on the sales dashboard.
Note
Setting clear and reachable targets is a powerful motivator for your sales teams.
Recurring sales and subscriptions
Note
The subscriptions feature requires the optional "Subscriptions" module, which is not part of the base Odoo installation. It is generally available in the Enterprise edition or as an additional module.
Configuring subscriptions
To handle contracts and recurring sales:
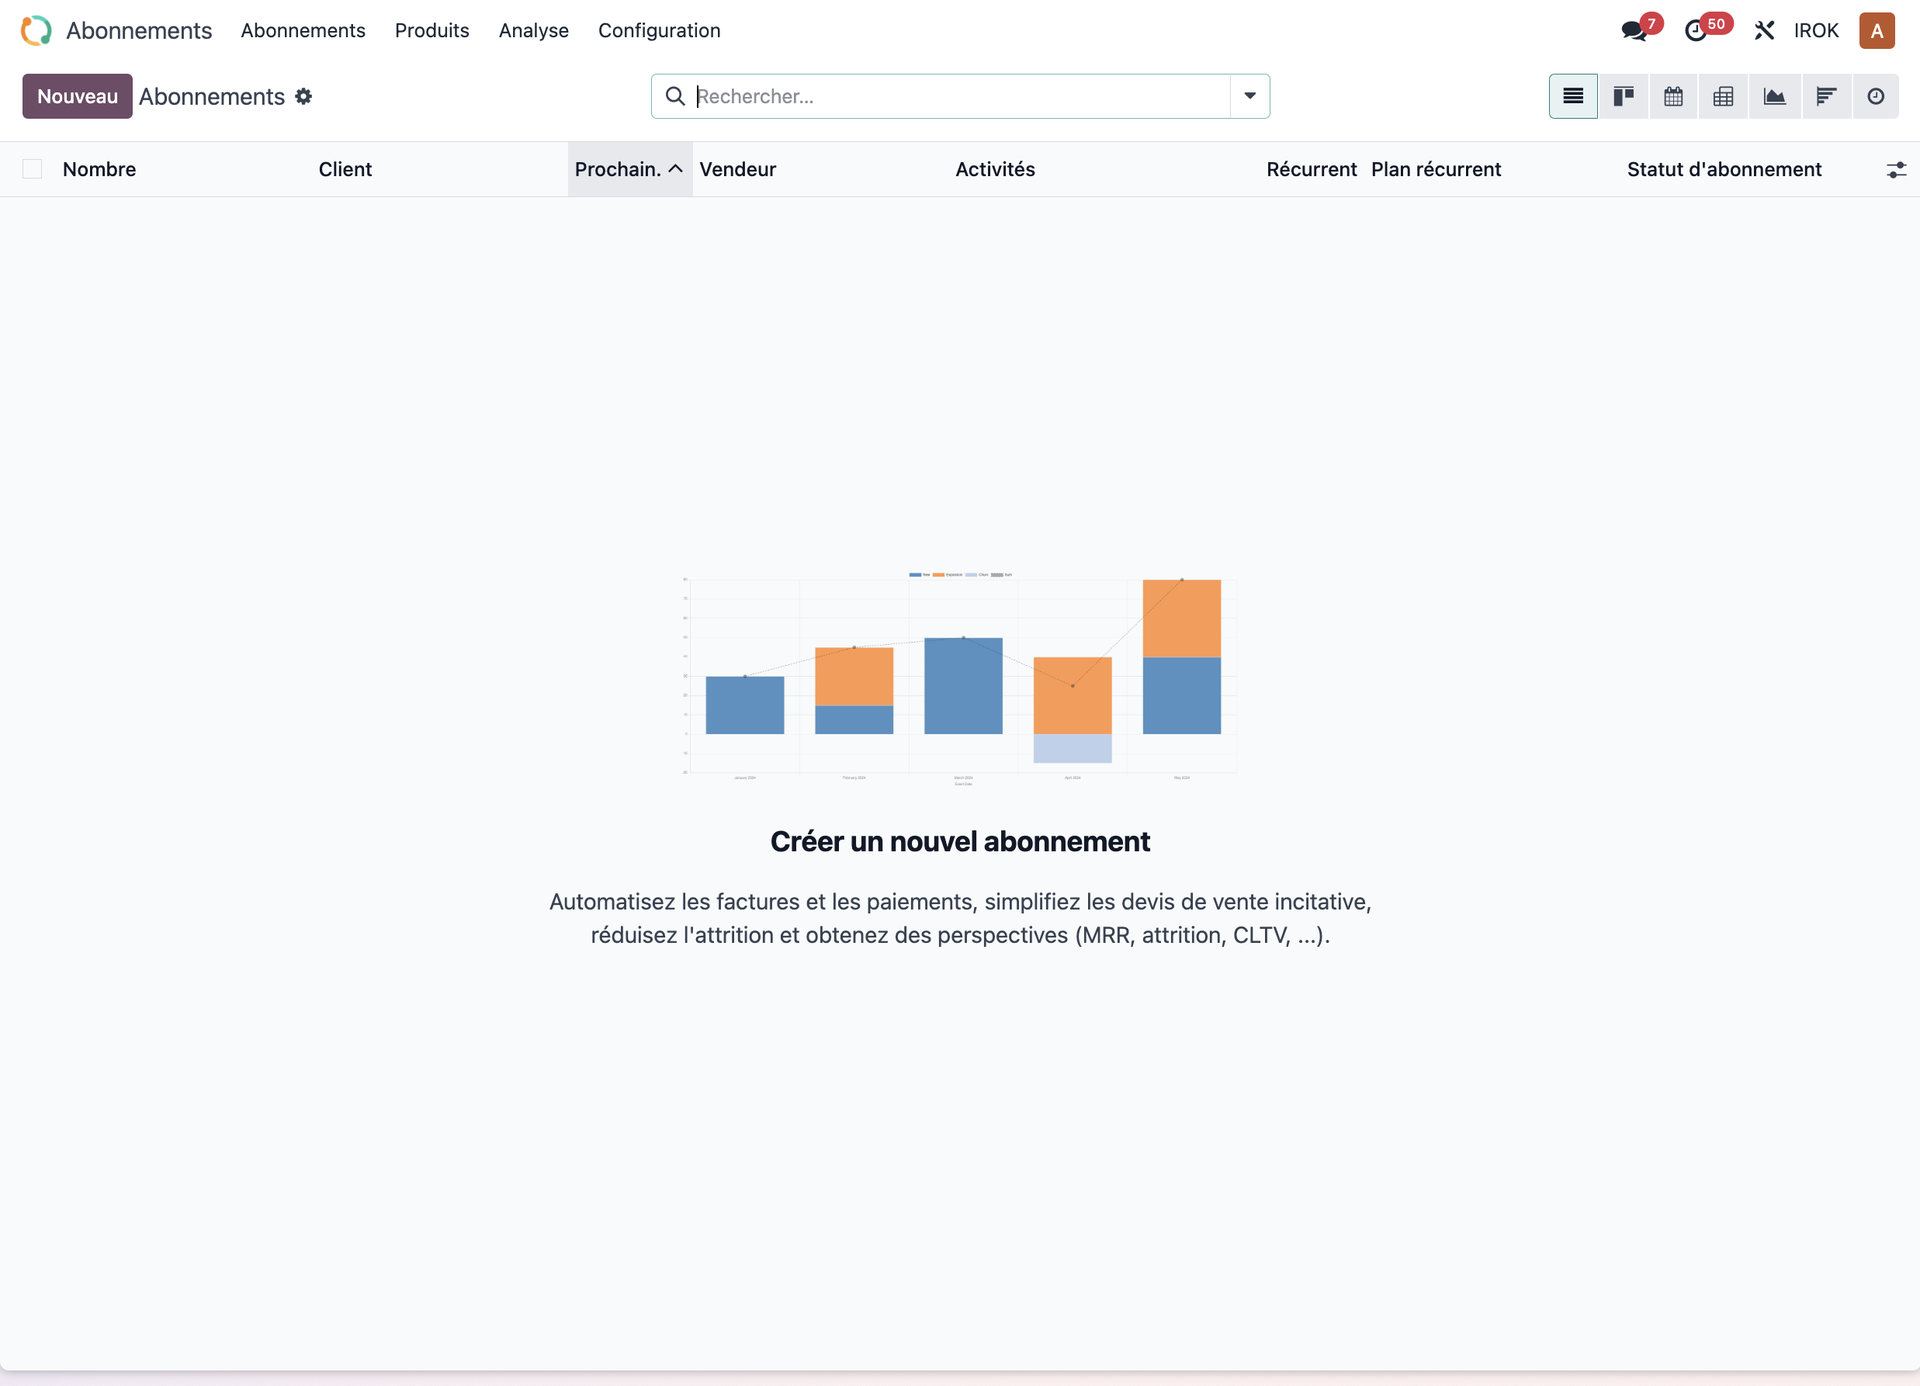
- Open the Subscriptions application.
- Create a new subscription template: - define the products or services included; - configure the periodicity: monthly, quarterly, yearly; - state the renewal terms; - set up automatic invoicing.
- Apply that template to your customers.
Tip
Recurring sales make your revenue more predictable and strengthen customer loyalty.
A complete process, end to end
A worked case: from quotation to delivery
Here is a concrete example illustrating the whole sales process in Odoo:
- Creating the quotation: - company ABC asks for a quotation for 10 units of product X and 5 units of product Y; - a quotation is created with the products requested; - a commercial discount of 5% is applied to the total; - the quotation is emailed to the customer.
- Confirming the order: - the customer approves the quotation through the customer portal; - the quotation becomes an order; - a delivery order is created automatically.
- Delivery: - the products are prepared in the warehouse; - the delivery order is validated; - the delivery note is printed to go with the goods.
First steps for a new salesperson
A salesperson's daily guide
A recommended daily routine:
- 8:30: look at the sales dashboard.
- 9:00: check the activities planned for the day.
- 9:30: follow up the quotations awaiting an answer.
- 10:30: check the newly qualified opportunities.
- 11:30: draw up quotations for the urgent requests.
- 14:00: make your planned calls and hold your meetings.
- 16:00: check the state of the deliveries under way.
- 17:00: plan your activities for the next day.
- 17:30: update your opportunities and your forecasts.
The five essential shortcuts
| Shortcut | Action |
|---|---|
Alt + N |
Create a new quotation quickly |
Alt + S |
Save your work in progress |
Ctrl + K |
Global search, to find a customer quickly |
Alt + E |
Display the archived records, such as former customers |
Alt + Shift + M |
Open the Action menu for the advanced options |
Note
On a Mac, press Control on any Odoo screen to see every keyboard shortcut available
in the current context.
Tips and good practice
Improving the sales process
Good practice for quotations:
- create quotation templates for your most common offers;
- use optional products to raise your average order value;
- set an expiration date to prompt the customer to decide;
- personalise your quotation emails to make them more compelling;
- follow the state of your outstanding quotations regularly.
Improving deliveries:
- check product availability before confirming an order;
- use partial deliveries for the products available;
- communicate with customers proactively when there is a delay;
- automate the shipping notifications.
Maximising your sales:
- analyse your conversion rates by product and by customer regularly;
- identify inactive customers and set up follow-up actions;
- use the reports to identify the products with the most potential;
- create targeted promotions on slow-moving products;
- set up alerts for regular customers who have not ordered for some time.
Solving common problems
The order is locked and cannot be changed.
- Check whether a delivery or an invoice already exists for that order.
- If so, you will have to cancel those documents first.
- For deliveries: go back to the delivery order and click Cancel.
- For invoices: create a credit note to reverse the existing invoice.
- Once those documents are cancelled, you can change the order.
The price displayed does not match the pricelist.
- Check the pricelist applied to the customer on their record.
- Check the active discounts or promotions that might affect the price.
- Check whether specific pricing rules apply: quantity, date and so on.
- Make sure the currency used is the right one.
Note
In Odoo, almost every problem has a logical explanation. In case of doubt, consult the message history attached to the order or to the document concerned, which often holds clues about what was done earlier.