Core features
Handling contacts
Handling contacts sits at the heart of Odoo and underpins many applications: sales, CRM, accounting and others.
Creating a new contact
To create a new contact in Odoo:
- Open the Contacts application.
- Click Create.
- Fill in the contact's information.
- Set the type of contact: individual or company.
- Add the contact details: phone, email.
- Select tags to classify the contact.
- Click Save.
Tip
Use tags to organise your contacts by category. You can create as many tags as you need, to make searching and filtering easier.
Individual contacts and companies
Odoo distinguishes two types of contact:
- Individual: a natural person.
- Company: a business or an organisation.
Individuals can be attached to a company, which builds a hierarchy of contacts. That is particularly useful for handling the different people within the same customer or vendor.
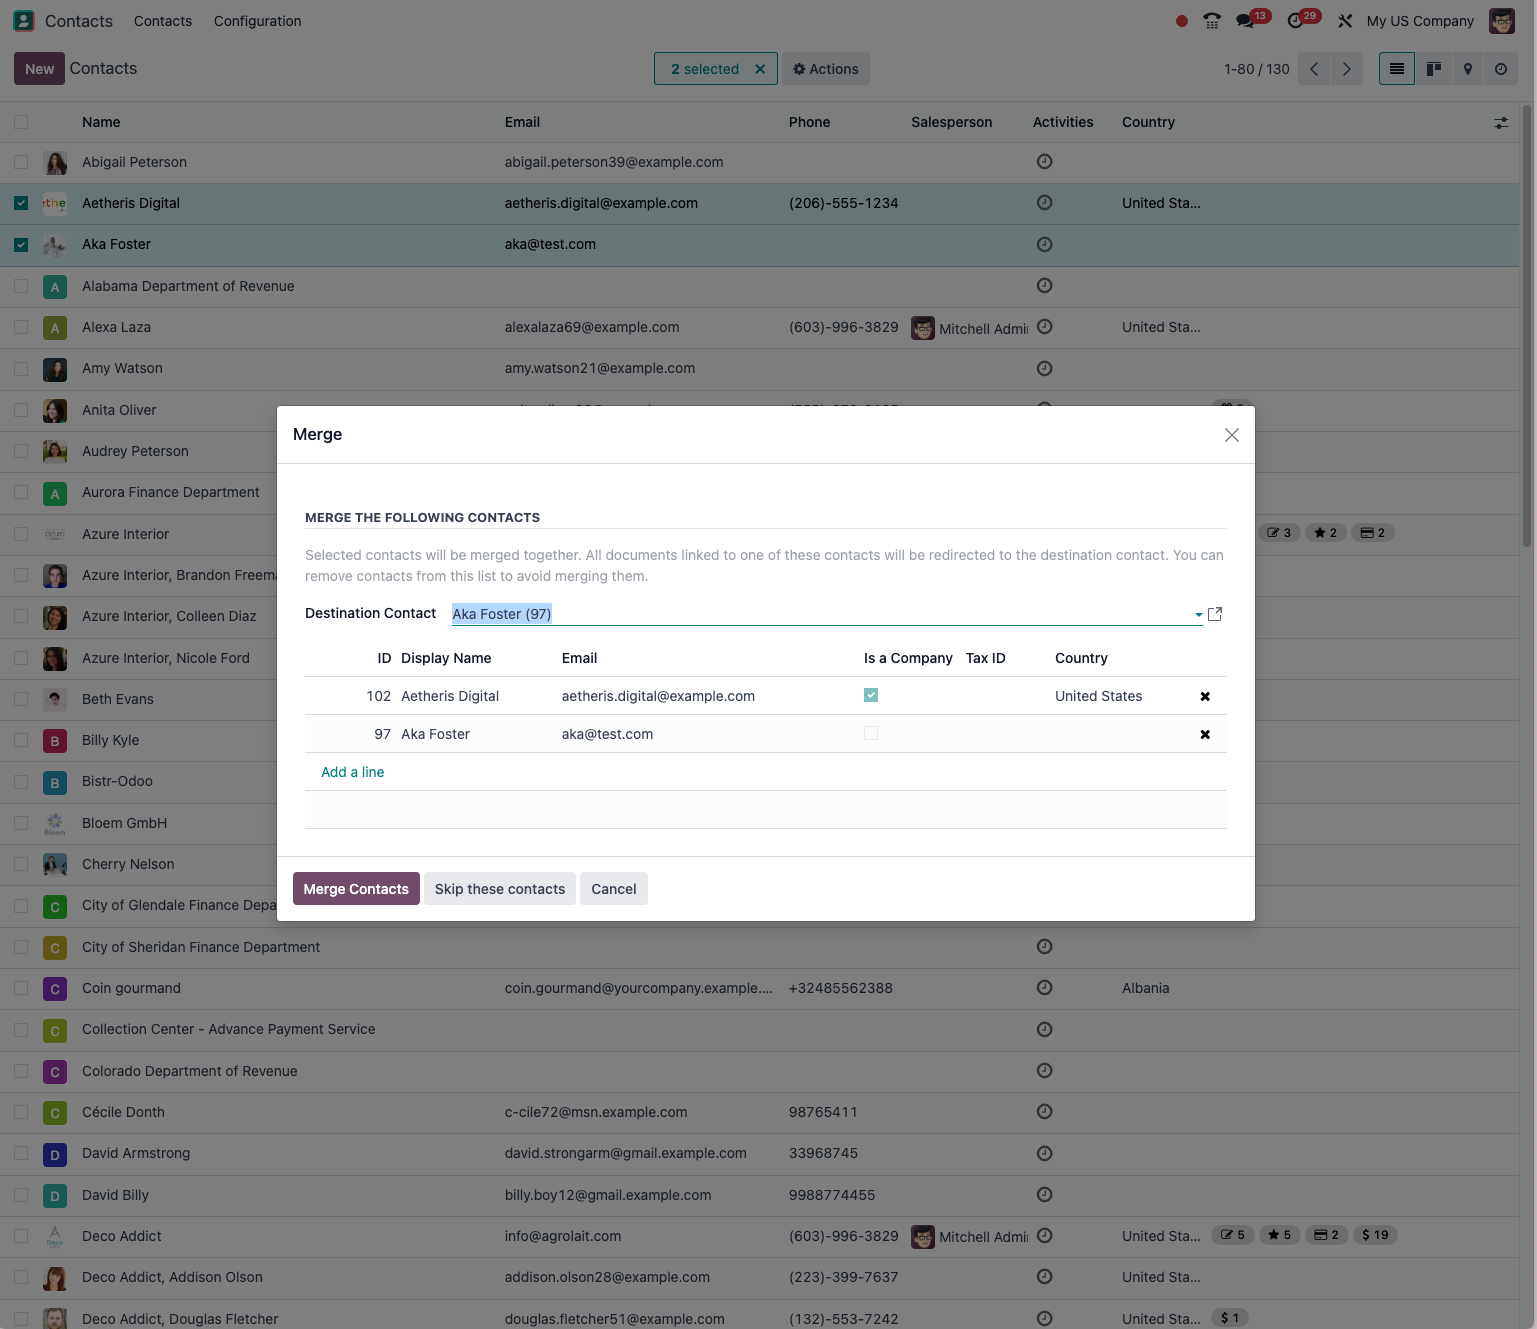
If you have duplicate contacts, Odoo lets you merge them easily:
- Select the contacts to merge in list view.
- Click Action then Merge.
- Choose which information to keep on the final contact.
- Confirm the merge.
Searching and filtering
Odoo offers powerful search and filter features for finding the information you need quickly.
Using the global search
The search bar at the top of the interface finds any type of record in Odoo quickly.
Advanced filters
For more precise searches, use the advanced filters:
- Click Filters in the view header.
- Select a predefined filter or build a custom one.
- Combine several conditions to narrow your search.
- Save the filters you use often.
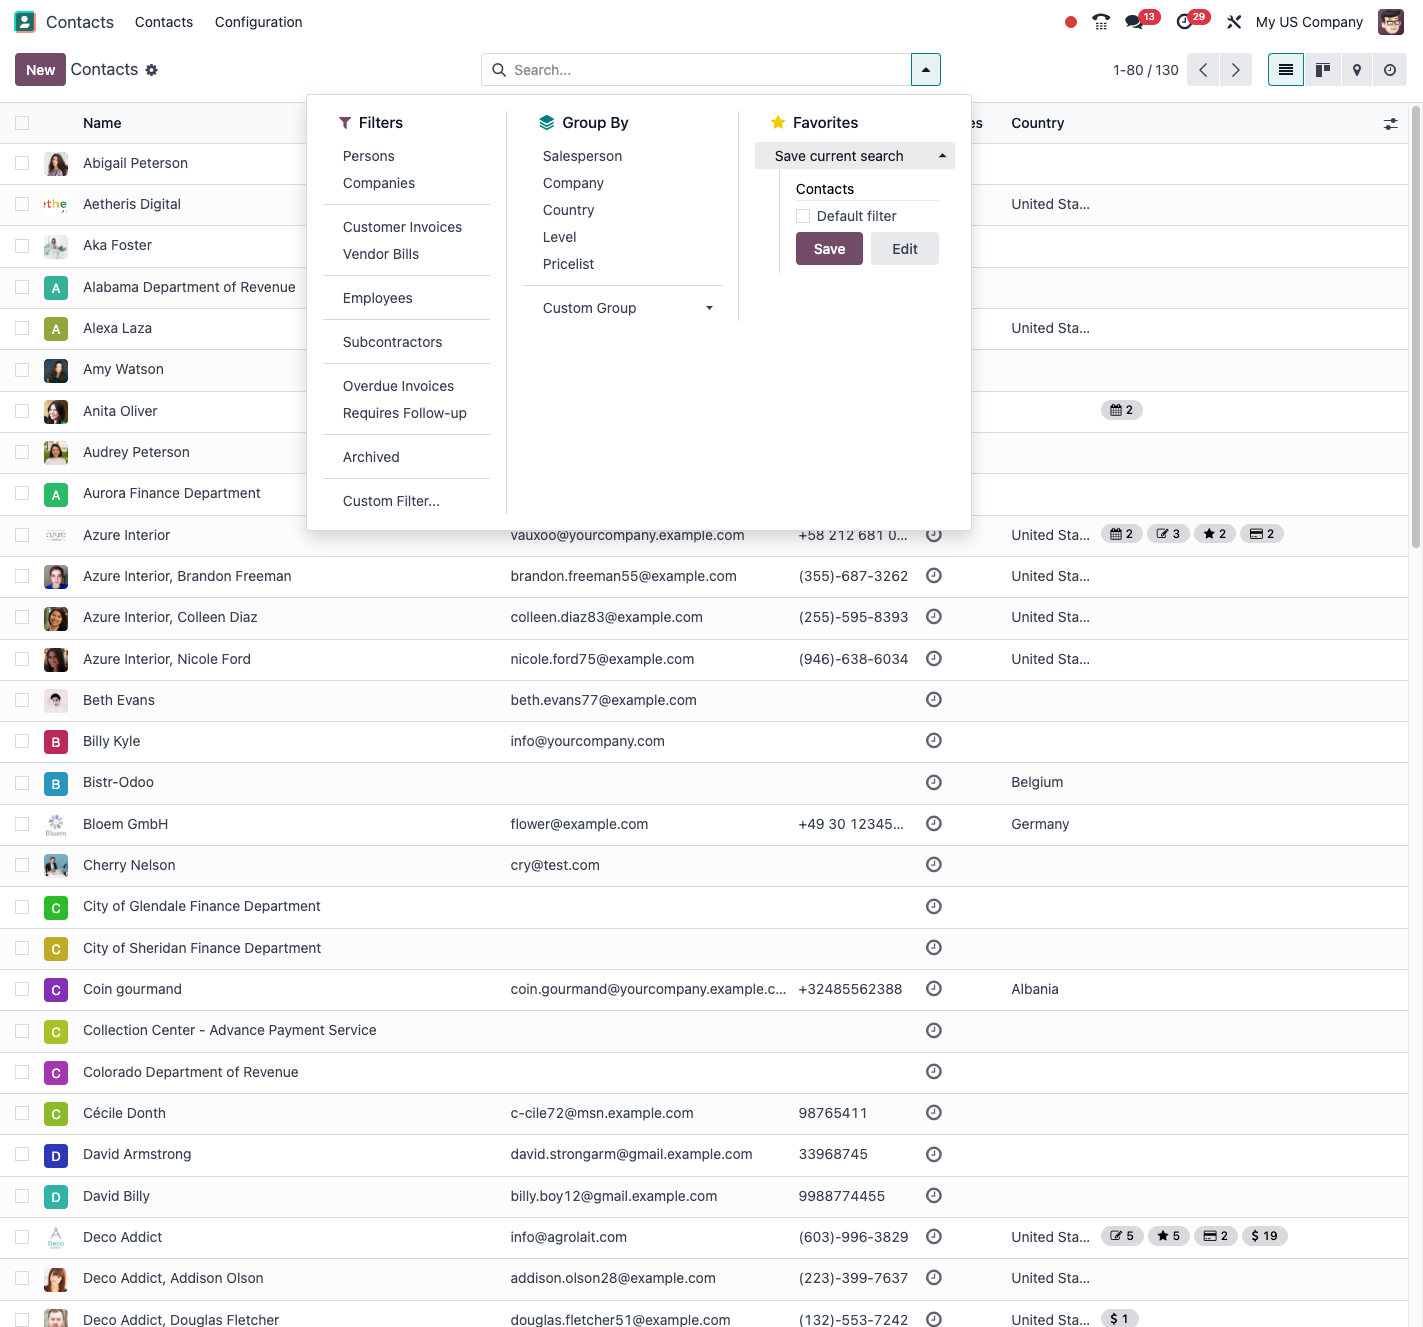
Create and save your own search filters for quick access to the data you consult regularly:
- Define your search criteria.
- Click Favorites then Save current search.
- Give your filter a name.
- Choose whether the filter is to be shared with every user.
- Click Save.
Grouping data
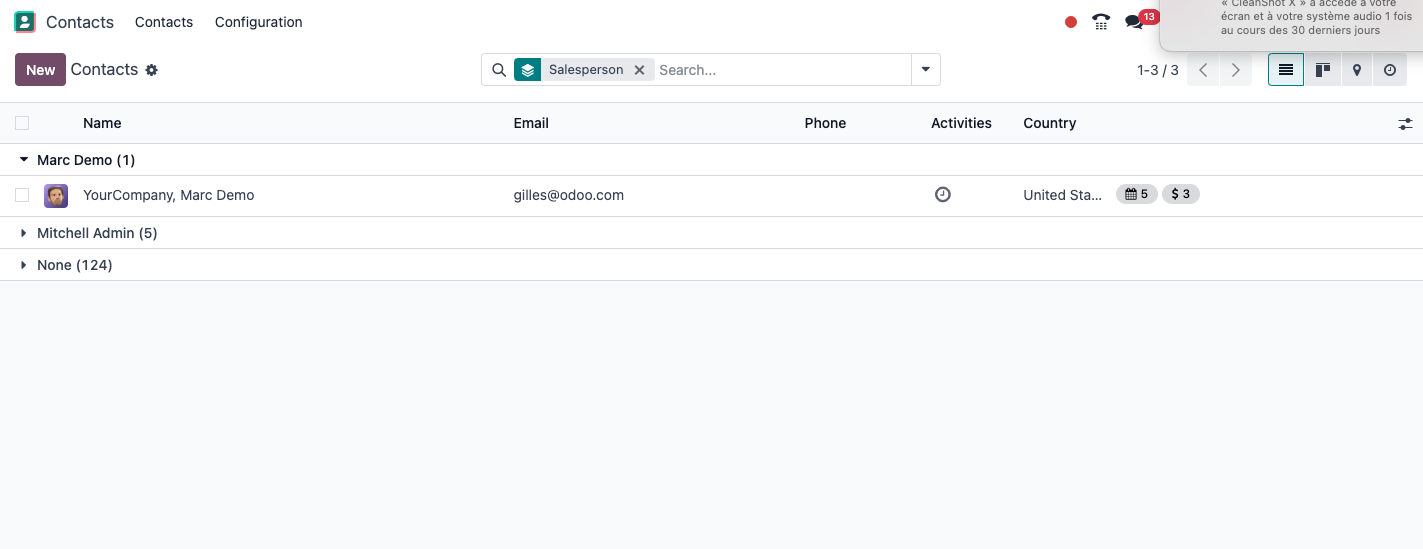
Grouping organises your data visually by various criteria:
- Click Group By in the view header.
- Select the grouping criterion: country, category, status and so on.
- You can add sub-groupings for a more detailed analysis.
Note
Grouping is particularly useful in list and kanban views. In list view it creates a hierarchy you can expand to see the detail.
Importing and exporting data
Odoo makes importing and exporting data straightforward, which matters both during the initial setup and for outside analysis.
Importing data
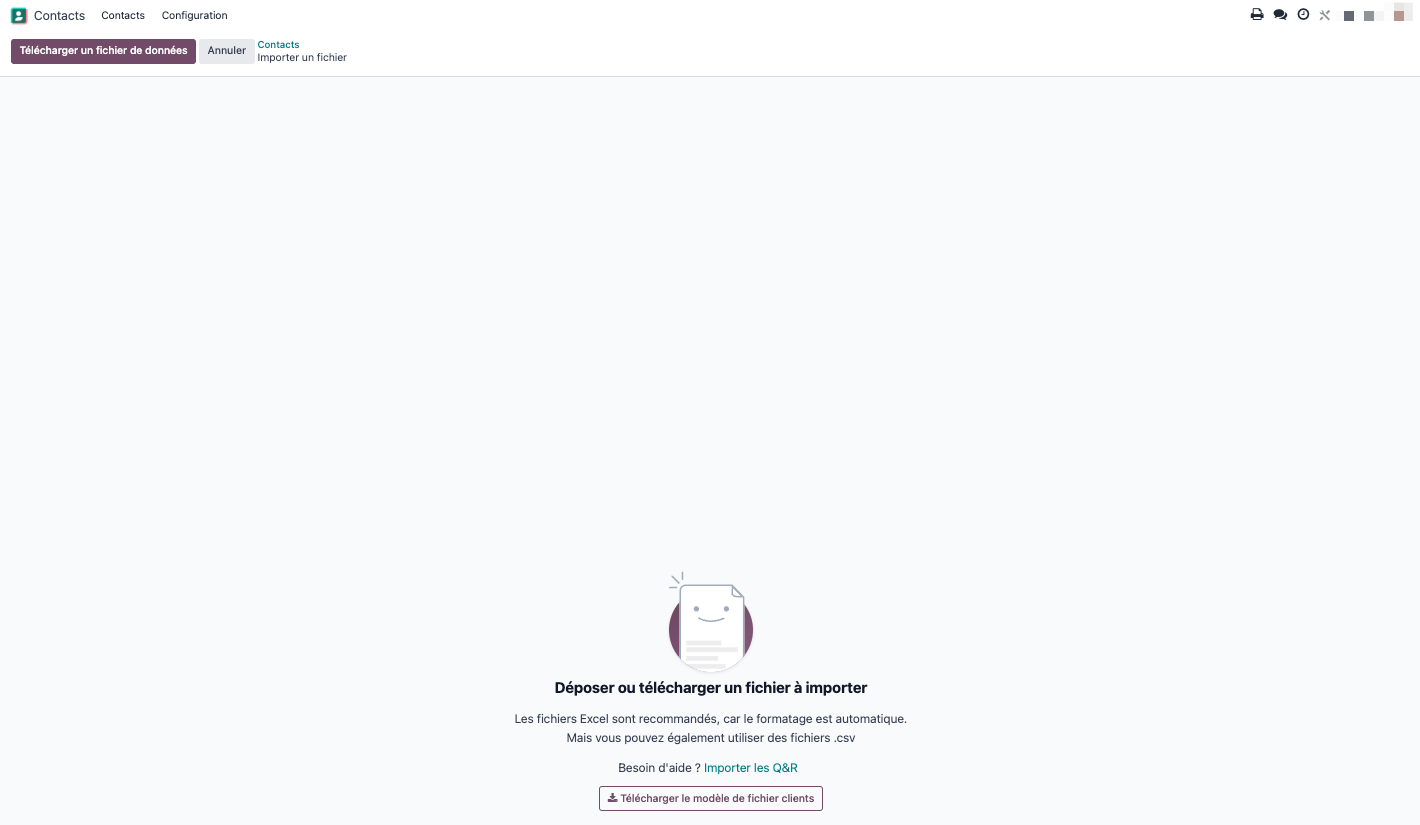
To import data into Odoo:
- Open the list view of the record type concerned.
- Click Import.
- Download a template file if you need one.
- Prepare your CSV or XLS file with the data to import.
- Upload your file.
- Map the columns to the Odoo fields.
- Check and run the import.
An example of a CSV structure for importing contacts:
name,company_type,email,phone,street,city,zip,country_id,customer_rank,supplier_rank
ABC Ltd,company,contact@abc.com,+33123456789,12 rue Exemple,Paris,75001,France,1,0
Jean Dupont,individual,jean.dupont@example.com,+33612345678,25 avenue Test,Lyon,69001,France,0,1
Tip
For complex imports, start by exporting similar data from Odoo to obtain a model with the right structure, which you can then adapt.
Exporting data
To export data from Odoo:
- Open the list view and apply the filters you want.
- Select the records to export, or leave everything selected.
- Click Action then Export.
- Choose the fields to export.
- Select the export format: CSV or XLS.
- Click Export.
Activities and notes
Odoo offers a cross-cutting activity system for planning and following the actions to be carried out on any record.
Scheduling an activity
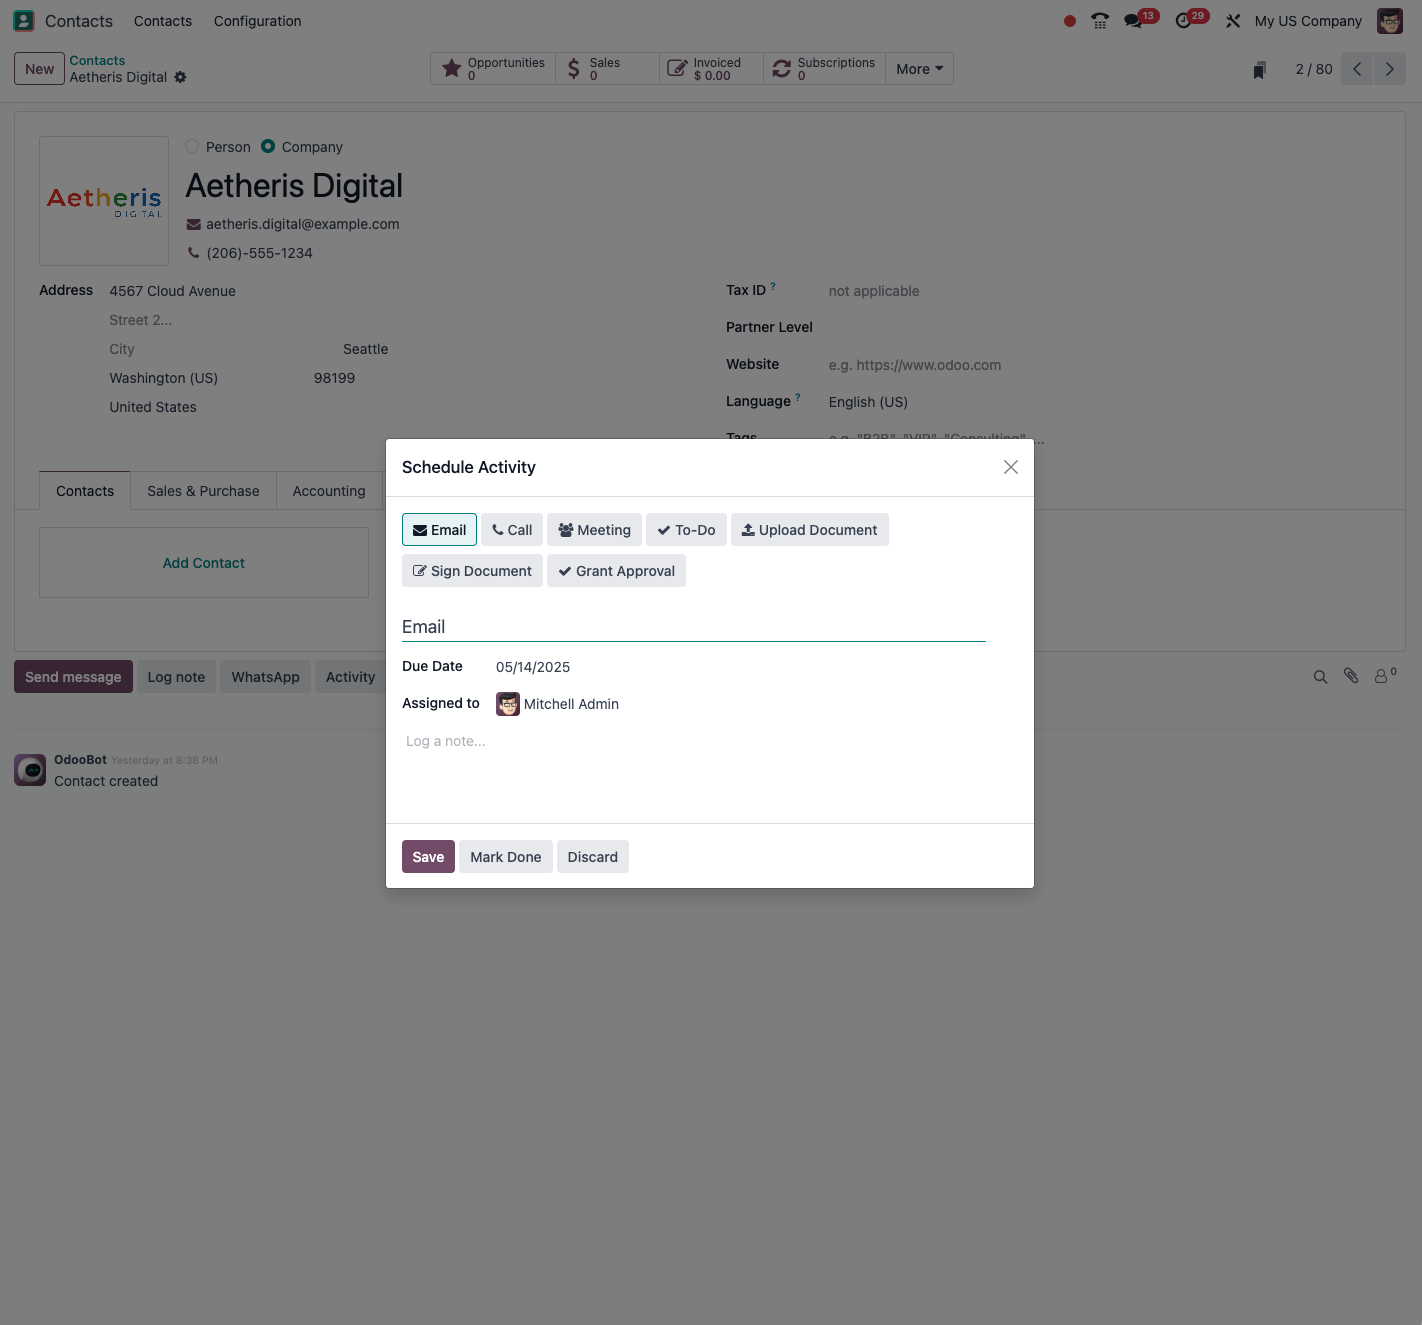
To schedule an activity:
- Open the record concerned: a contact, an opportunity, a project.
- Click Activities then Schedule Activity.
- Select the type of activity: call, meeting, email and so on.
- Set a due date.
- Assign the activity to a user.
- Add a note if needed.
- Click Schedule.
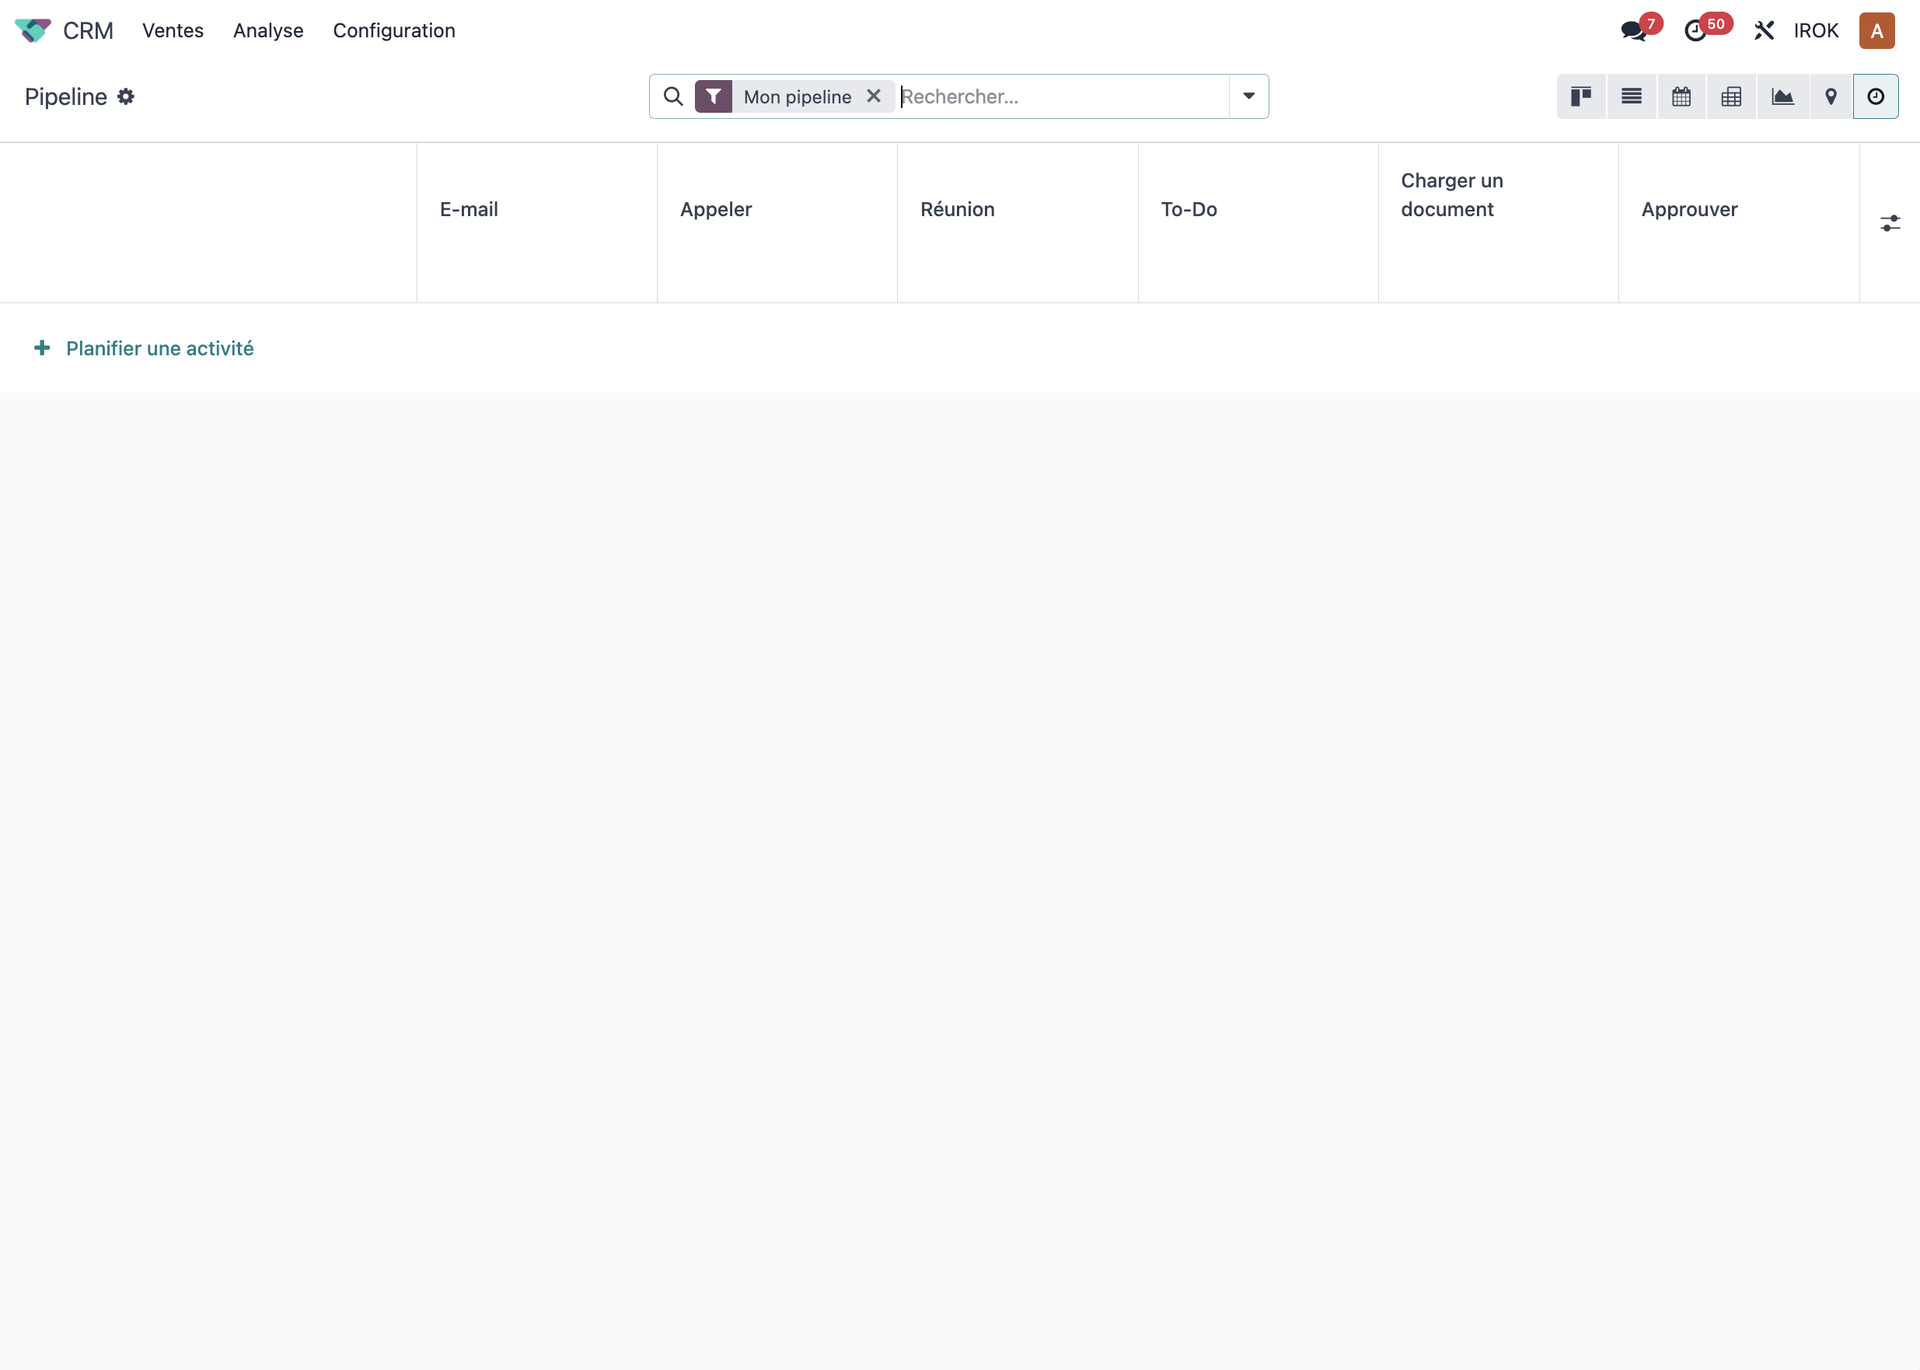
Reach all your planned activities from the Activities menu in the navigation bar. That dashboard shows:
- overdue activities;
- activities due today;
- activities planned for the coming days.
Adding notes and messages
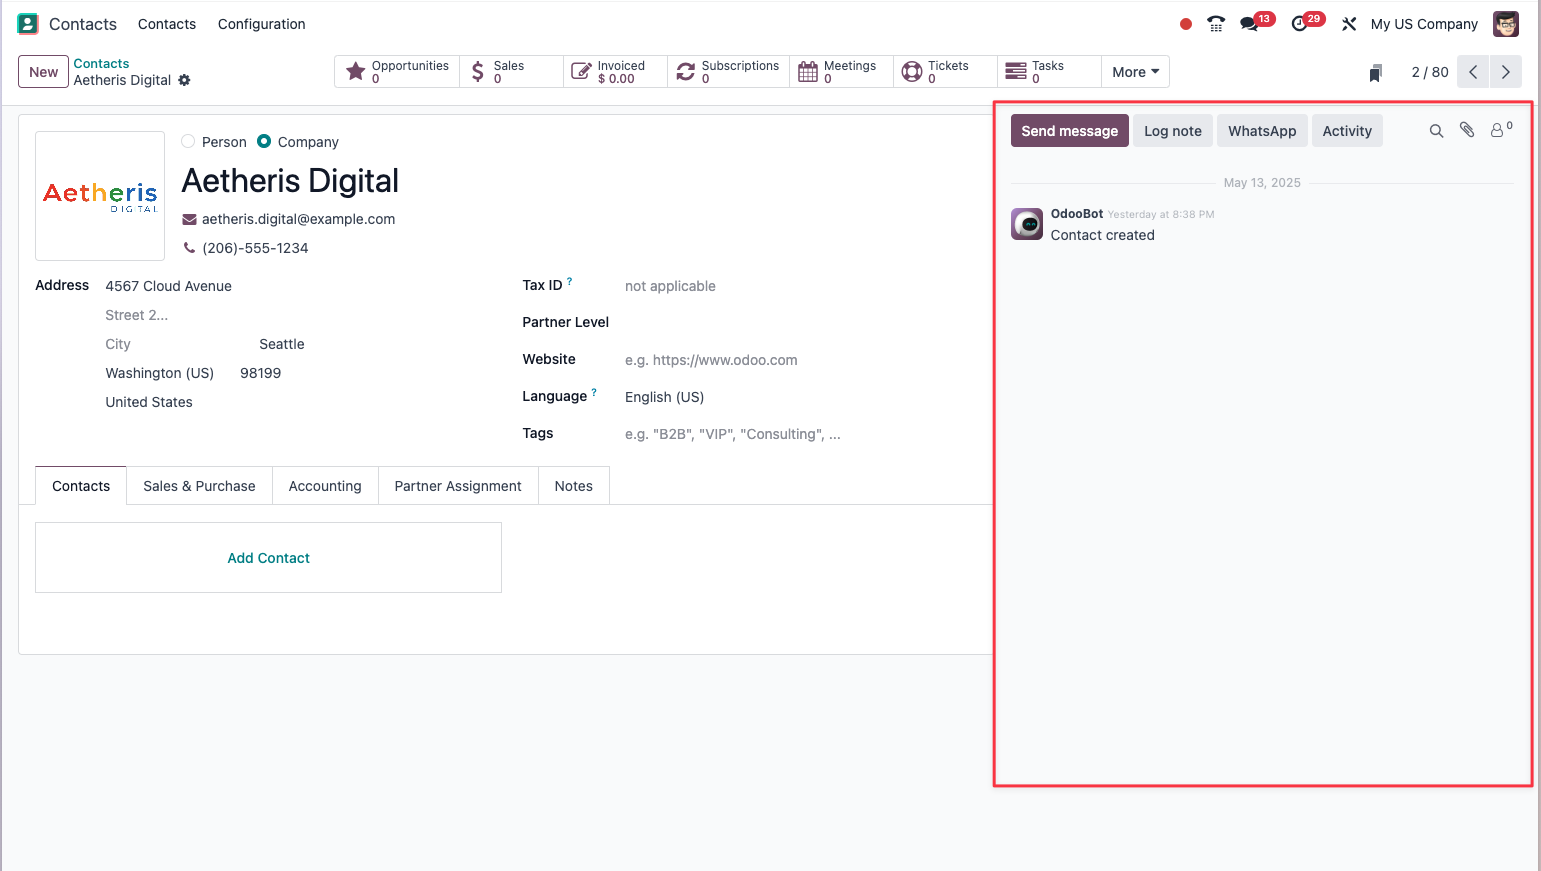
Odoo's internal messaging system, the chatter, lets you add notes and exchange messages on every record:
- Open the record concerned.
- In the messages and notes area at the bottom of the form:
- Select Note for a note visible only to employees.
- Or select Message for a communication that can include outside partners.
- Write your text.
- Add attachments if needed.
- Click Send.
Note
Notes are never sent to outside partners, even when they follow the record. They serve internal communication only.
The rich text editor
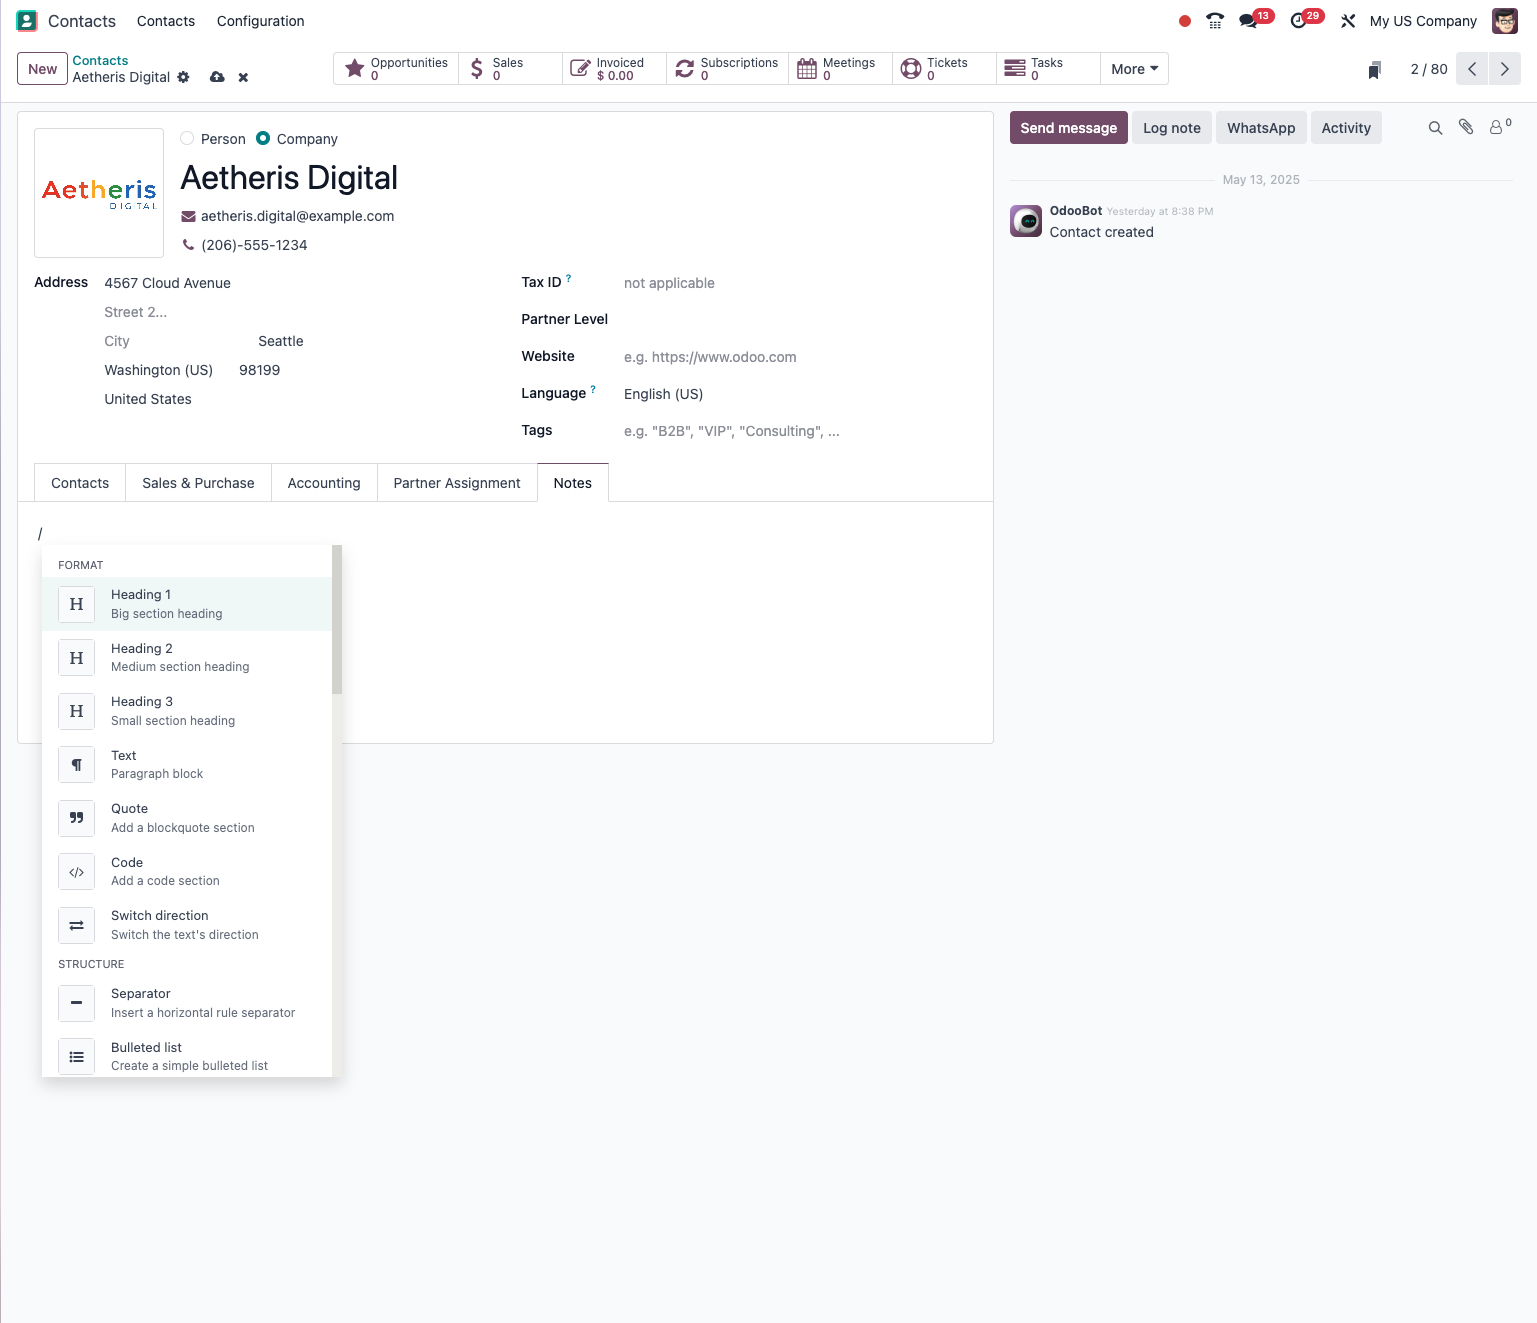
Odoo includes a rich text editor for writing formatted content: emails, notes, descriptions. It offers many formatting options:
- text formatting: bold, italic, underline;
- bulleted and numbered lists;
- tables;
- inserting images;
- hyperlinks;
- paragraph styles;
- text and background colours.
Tip
Use Ctrl + K (or Cmd + K on a Mac) to insert a link
quickly in your text. On a Mac, press Control on any Odoo screen to see every keyboard
shortcut available.