A tour of the interface
By the end of this chapter
- find your way around the screen and move between applications;
- use the command palette and question the built-in assistant;
- choose the view that suits what you are trying to do;
- filter, group and keep your searches as favourites.
Every Odoo application shares the same interface and the same actions. Master them once and you will not have to learn them again application by application.
Logging in
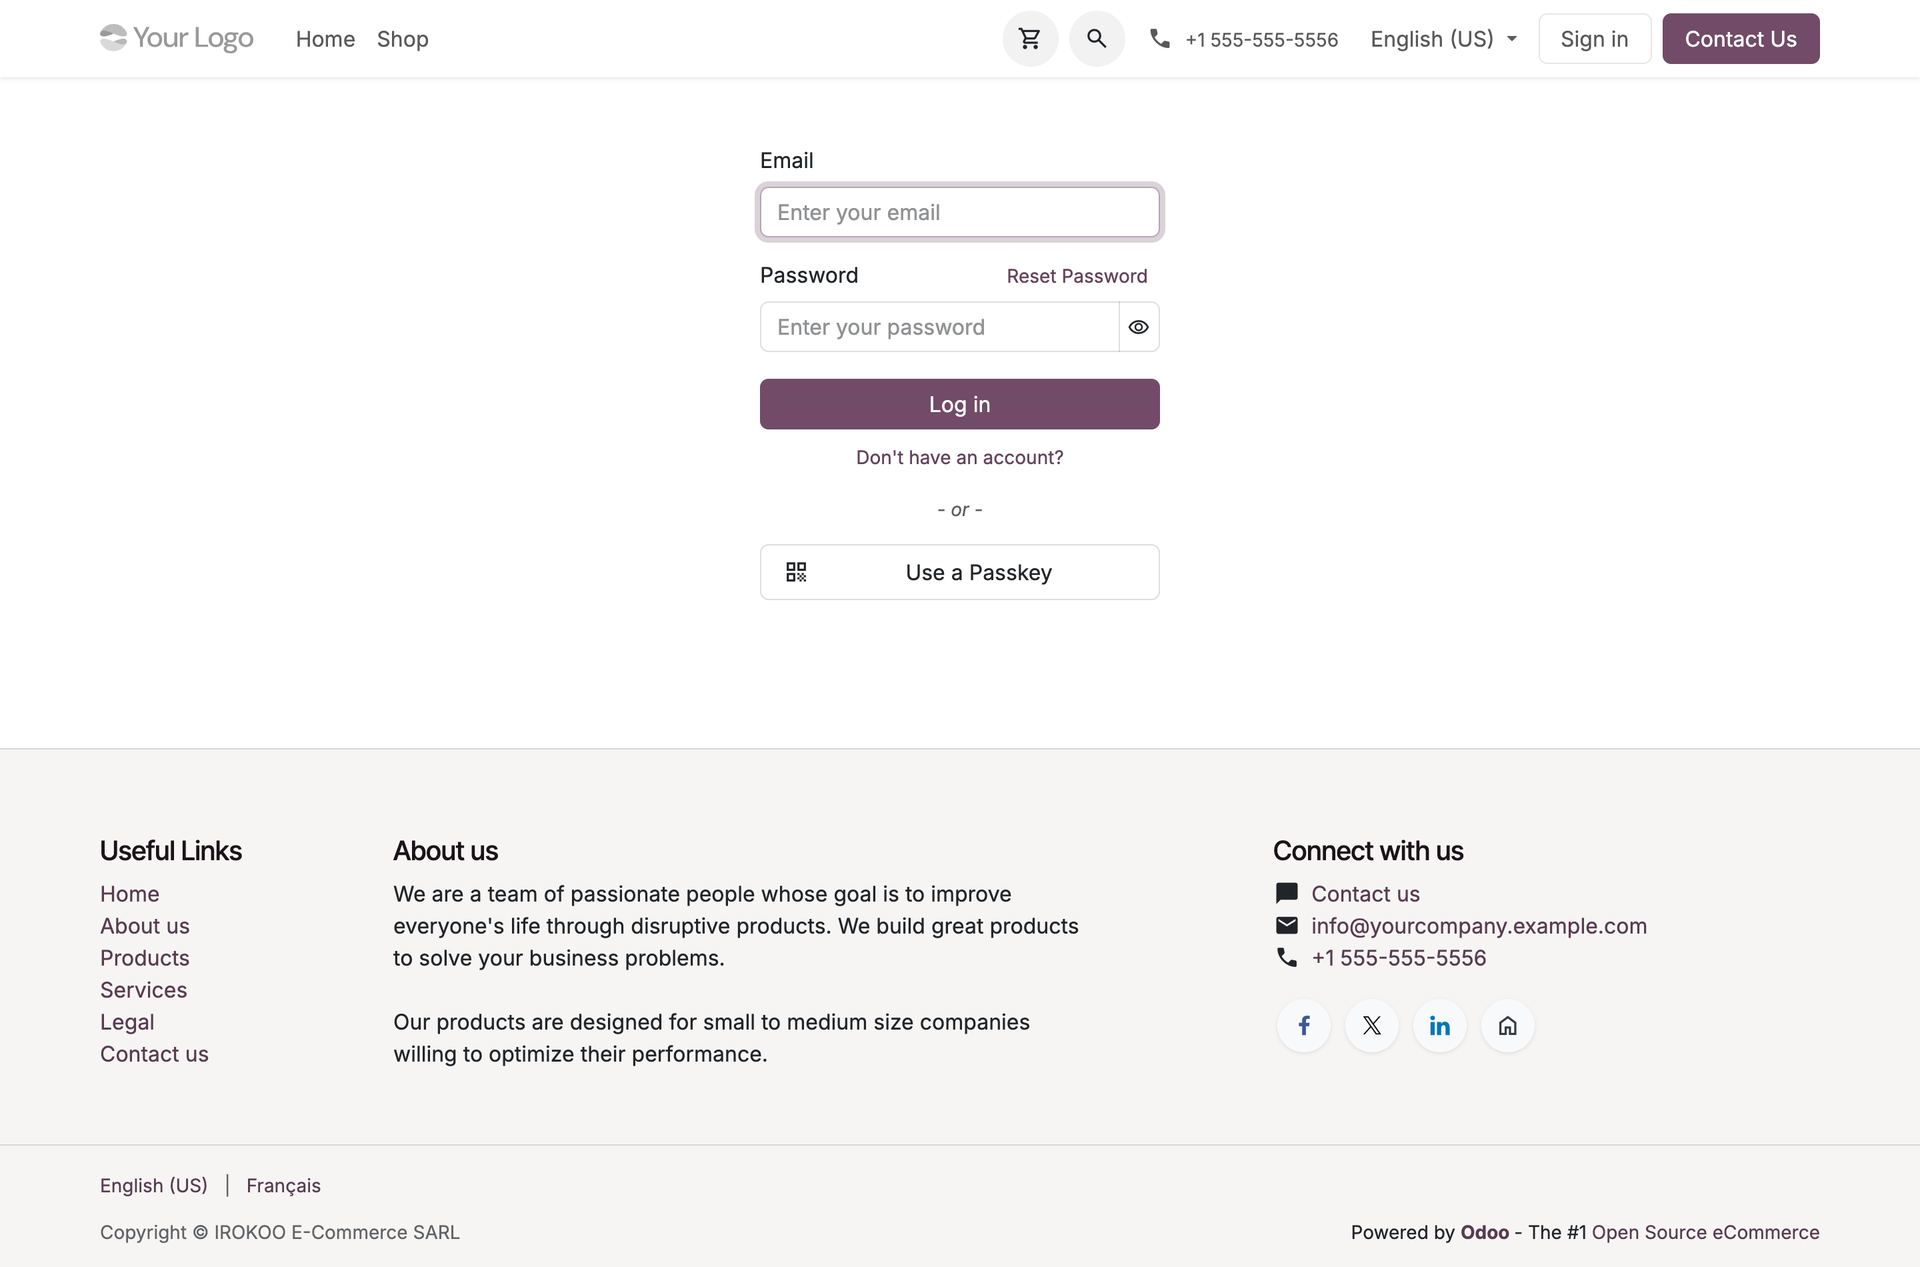
- Open a recent browser: Chrome, Firefox, Edge or Safari.
- Enter the address of your Odoo instance.
- Fill in the email address and the password.
- Click Log in.
If you have forgotten it, the Reset Password link sends a reset email to the account address.
From a mobile device
The web interface adapts on its own to phone and tablet screens: a browser is enough. For daily use, Odoo can in addition be installed as an application, by two routes that are not equivalent.
The progressive web application, recommended. It installs from the browser, without going through a store, and stays up to date at the same time as the database.
- Open the database in the phone's browser and log in.
- On Android, open the browser menu and choose Install.
- On iOS, open the share menu in Safari and choose Add to Home Screen.
- On a computer, click the install icon at the right of the address bar.
Odoo then appears as an application: its own icon, full-screen opening, push notifications.
The store applications, available on Google Play and the App Store. They accept several accounts, but they carry a limitation that is decisive in a business setting.
Watch out
The store applications do not support single sign-on. If your users log in through a corporate Google or Microsoft account, those applications will not work: the progressive web application is the one to choose.
Tip
For a field fleet (warehouse staff, technicians, travelling sales representatives) have the progressive web application installed during the training itself. It removes the need to type the address at every connection, which is the main reason mobile access gets abandoned.
Working without a connection
When the network link is interrupted, Odoo switches to offline mode and stays usable on whatever was already opened online: the lists, the kanban views and the records consulted remain accessible, served from an encrypted local cache. This capability is aimed at field use, where network coverage is irregular: data entry in the workshop, stocktaking in the warehouse.
A Working offline indicator appears in the top bar. The applications and menu entries that were not opened during the session are greyed out, along with the buttons that cannot work without the server.
Data entry stays possible on the screens available: creating a record, editing its fields, archiving it, unarchiving it or deleting it. Each gesture becomes a pending operation, sent as soon as the link returns; the indicator then switches to Syncing. A click on it opens the list of pending operations, each carrying its subject and its nature, Created, Updated, Archived, Unarchived or Deleted. The bin icon at the end of the row, with the tooltip Discard offline changes, abandons the operation after confirmation.
The pending operations are kept on the workstation: they survive a page reload and the browser being closed, and they set off again at the next start as soon as the server answers.
Note
Search, on the other hand, is not served offline. The search bar only offers the searches already used online on that screen; a filter whose data is not in cache displays There is no data to display offline for the given filters, with a Reset Filters button.
Watch out
Offline, file and image fields, property fields and nested table lines turn read-only; export and duplication are unavailable. The mode also assumes the database is served over HTTPS, the condition for encrypting the local cache.
Watch out
If the server refuses an operation at synchronisation time, it stays in the list and the indicator switches to Sync issues. Nothing is written until the case is settled: open the list to resume the entry or abandon the operation.
If the page itself is reloaded while the network is down, Odoo displays a You are offline screen with a Recheck button. That screen reloads itself as soon as the connection comes back.
Tip
If you expect an outage, open beforehand the screens you will need, including the creation form: offline, only what has already been displayed is reachable.
Structure of the screen
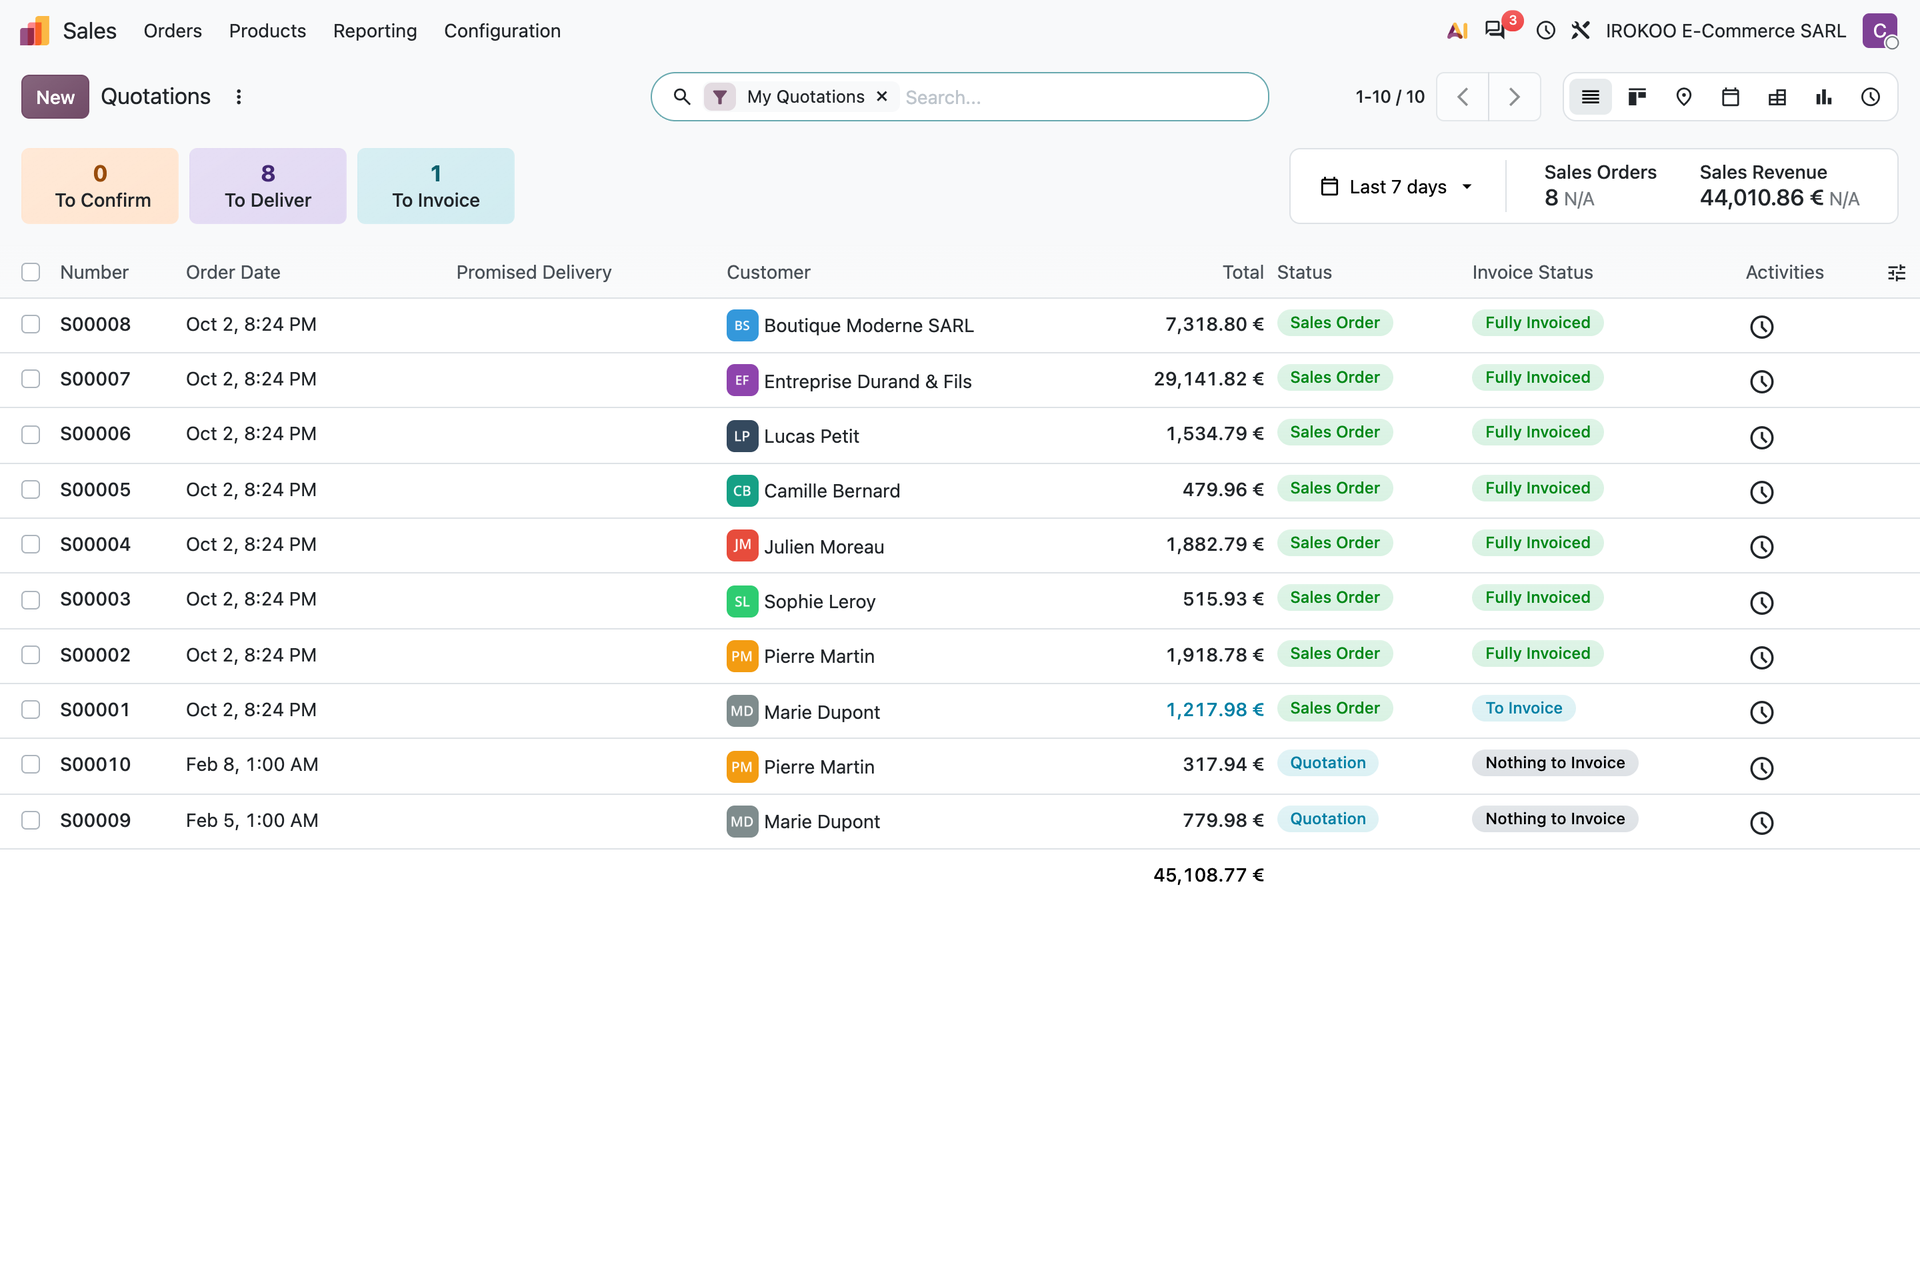
The interface is made up of six constant areas:
| Area | Role |
|---|---|
| Top bar | Access to the applications, global search, notifications, user menu. |
| Application menu | The sections of the active application, to the left of the top bar. |
| Breadcrumb | The path travelled; lets you go back to the previous screen without losing the context. |
| Search bar | Filters, groupings and favourites of the current view. |
| Main area | The content displayed: list, form, kanban, chart. |
| View switcher | Switches between the available representations, at the top right. |
Getting around
Moving from one application to another
Click the menu icon at the top left to display the grid of installed applications, then choose the one you want.
The order of the tiles can be changed, which lets you put the ones you use every day at the front.
- Click the tile to be moved and hold the button down for half a second, until it comes loose.
- Drag it to its new place, then release.
Note
Holding is essential: an ordinary click opens the application. It is that delay which distinguishes the two gestures, and it explains why moving a tile often seems impossible to someone who does not know about it.
The resulting order is specific to each user: it does not affect what the others see.
The command palette
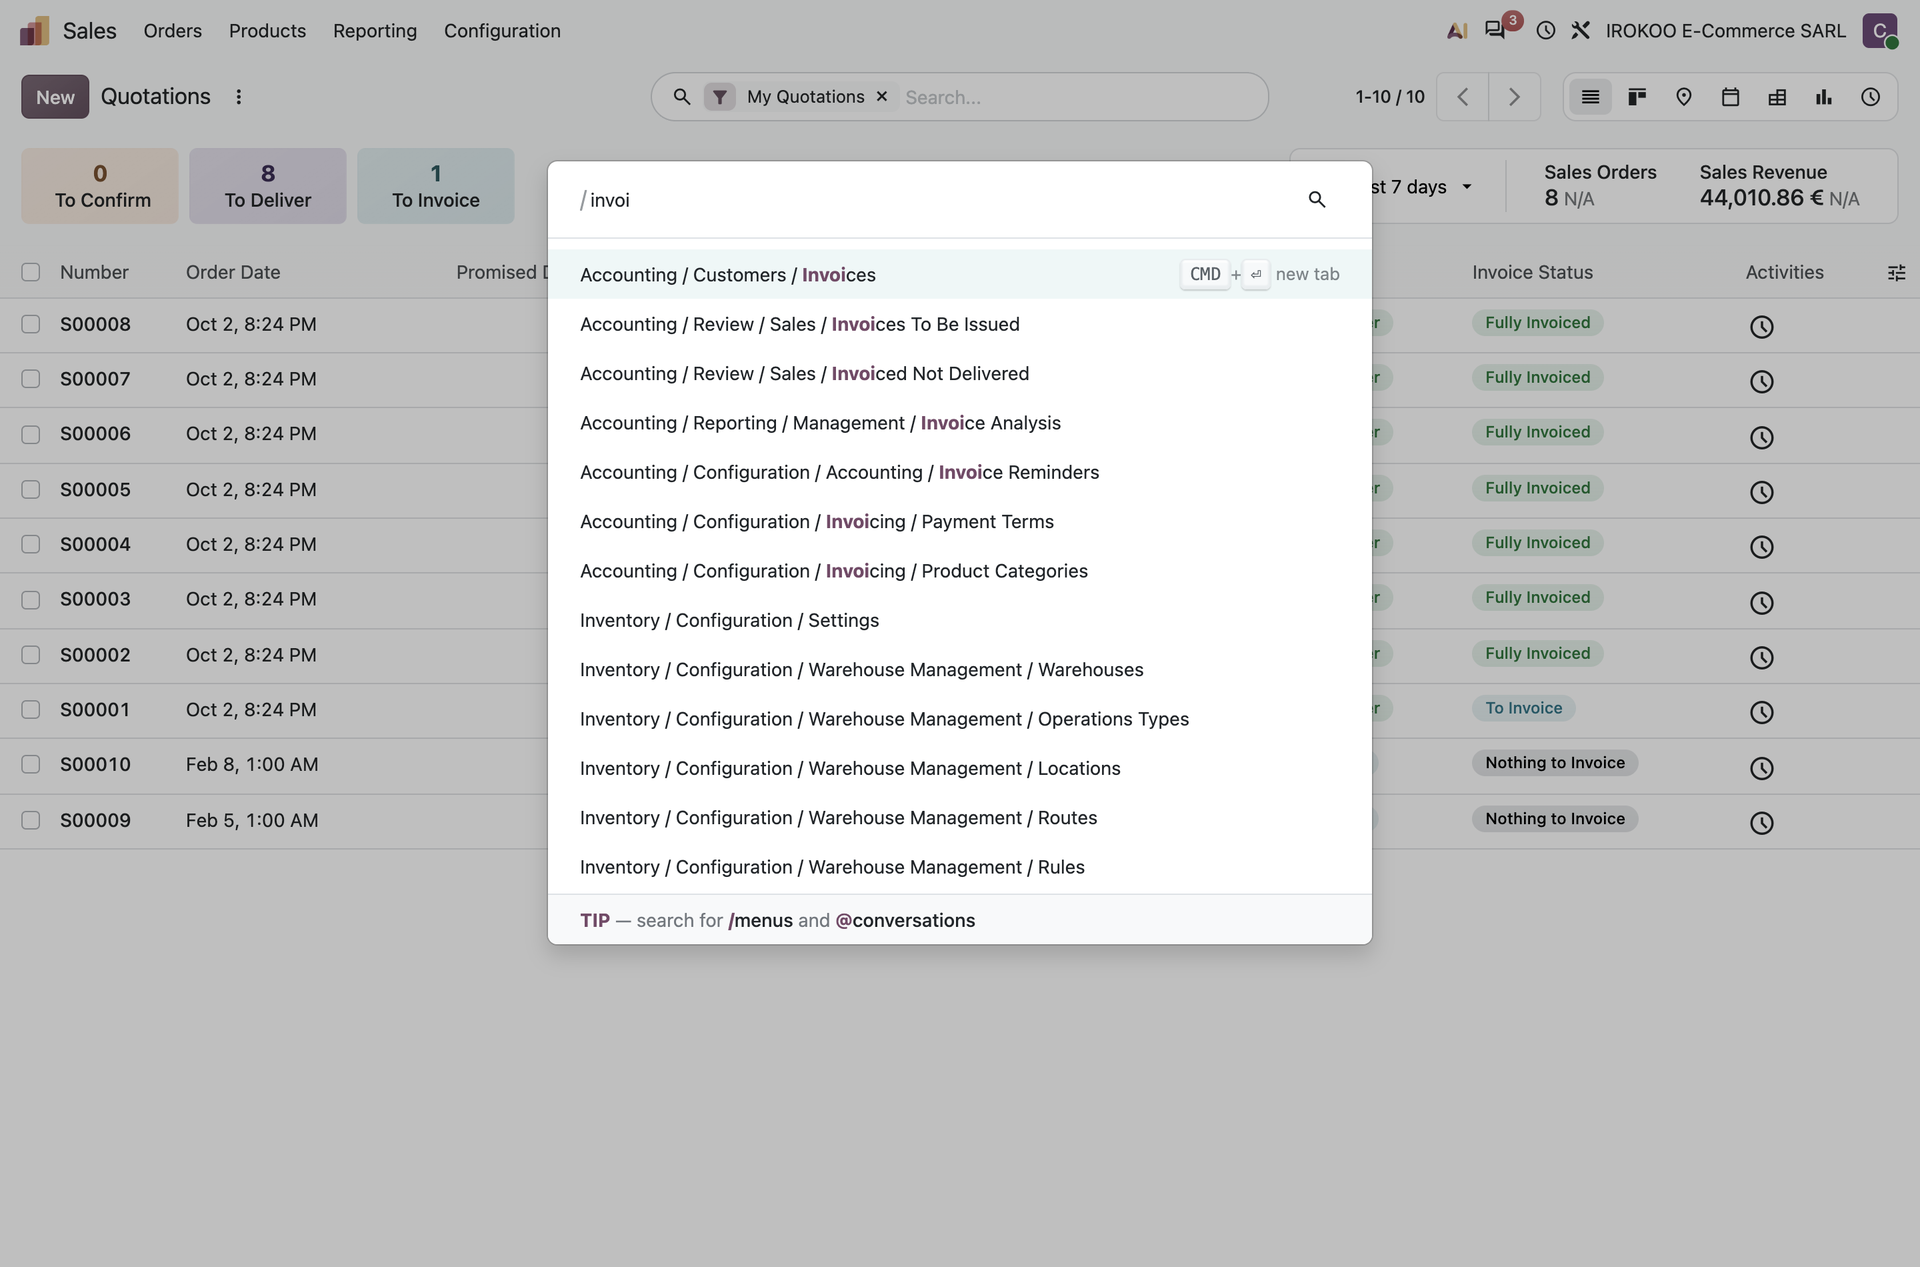
The command palette is the fastest way to reach any point of the database.
- Press
Ctrl+K:Cmd+Kon a Mac. - Type the term you are looking for directly, or precede what you type with a character to narrow the field of search:
| Prefix | Searches |
|---|---|
/ |
Applications and menu entries |
@ |
Conversations: people and channels |
? |
Knowledge base articles |
$ |
Hidden knowledge base articles |
- Confirm with
Enter, orCtrl+Enterto open the result in a new tab: this last gesture only applies to results of the menu or application kind.
Questioning the assistant
From the command palette, a question phrased in plain language can be put to the built-in assistant, which answers, opens the requested view or drafts a piece of content.
- Open the palette with
Ctrl+K. - Type the request out in words.
- Click the assistance icon, or confirm with
Enter. - The answer appears in a conversation window.
Hovering over the answer offers three actions:
- Send as Message: opens a pre-filled email containing the answer;
- Log as Note: records the answer in the document's chatter;
- the copy icon: places the text on the clipboard.
Note
This feature belongs to the Enterprise edition. The assistant is configured never to display a technical error message: when an operation fails, it explains it in plain words and offers the next step. It does not declare an action done unless the tool carrying it out has confirmed so.
The assistant works with your access rights: an operation that exceeds them fails, and rephrasing will change nothing. It is then the administrator you need to approach (see chapter 6).
Watch out
The assistant's answer is a draft written from the context of the document. It is neither checked nor validated: read it again before sending it to a customer or filing it in a case.
The conditions for using the assistant
There is no provider to choose and no access key to fill in: the assistance functions can be used as they are, whatever the hosting mode. Usage is billed, however, in the form of credits, on the Odoo AI in-app purchase service.
To check the balance or top it up:
- Open the Settings application, General Settings pane.
- Scroll down to the Odoo In-App Purchase section.
- Click View My Services: the list opens on the balance of each service, with the Buy Credits button.
Note
This screen is reserved for the administrator of the database; the other users work with the assistant without having access to it. Configuring the agents and the default instructions requires, besides, the AI application to be installed, which is covered in chapter 20; the writing assistance functions can be used without it.
Watch out
When the balance runs out, the assistance functions stop and a notification reports the lack of credits. The budget devoted to assistance is therefore to be settled before opening its use up to the teams.
The types of view
List view
Each row is a record, each column an item of information.
- Click a column header to sort.
- Tick the boxes on the left to select several records; an Actions menu then appears, to process them in bulk.
- Change a value directly in the list: click the cell, type, then save.
Tip
To apply the same value to several records, select them, then change the value on the first row: the change is offered for the whole selection.
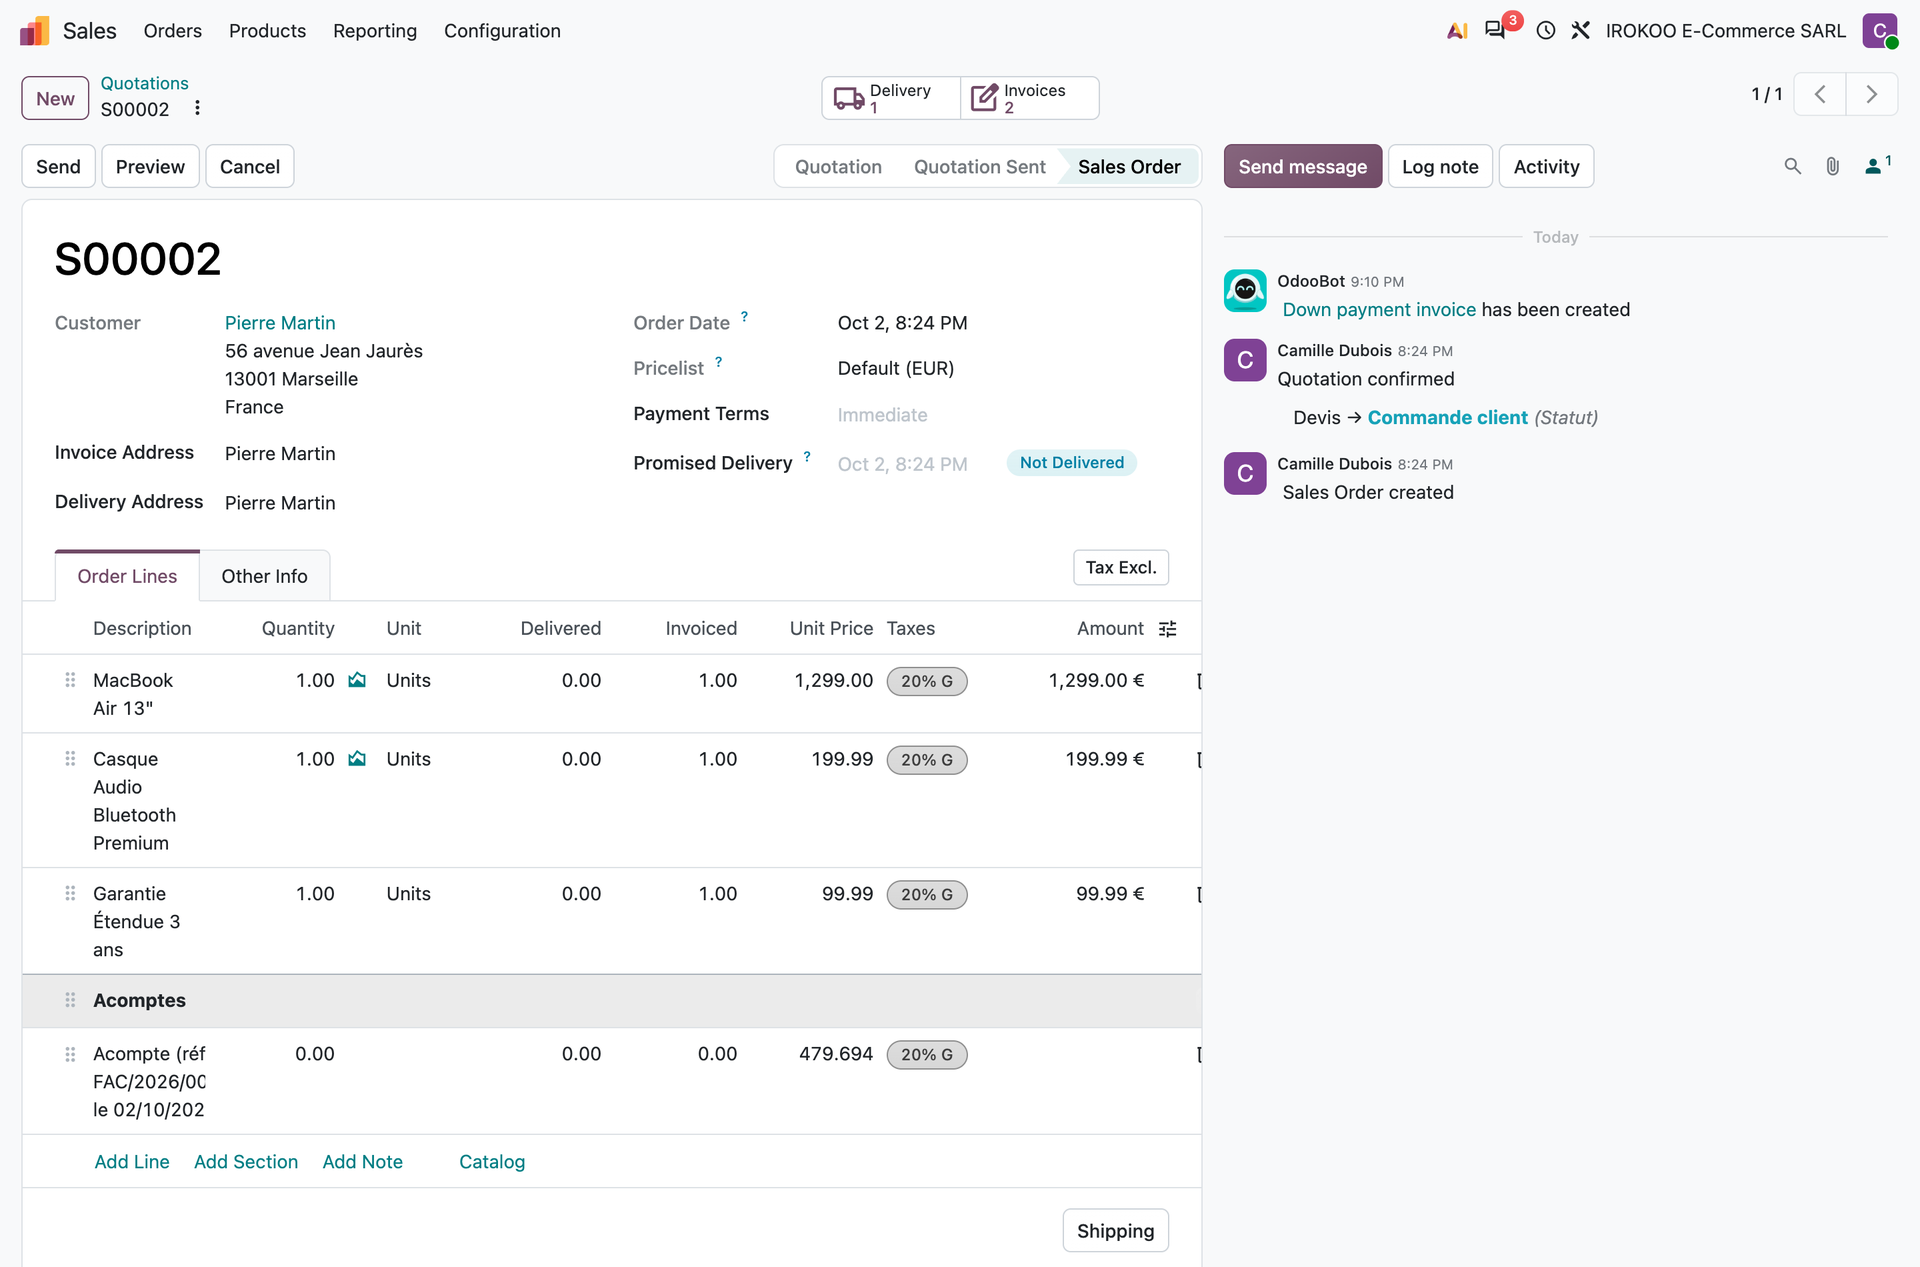
Form view
The form view presents a complete record, organised into groups of fields and into tabs.
- The action buttons are at the top left.
- The smart buttons, at the top right, give access to the linked documents and display counters.
- The navigation arrows let you move to the next record without going back to the list.
- The chatter, at the bottom, brings together messages, notes and activities.
Kanban view
Records appear as cards spread over columns. Dragging and dropping from one column to another changes the stage. This is the working view for processes: sales pipeline, project tasks, recruitment.
Other views
- Calendar: places the records in time.
- Graph: bars, lines or pie.
- Pivot: a cross-tabulation with measures.
- Gantt: scheduling and dependencies (Enterprise).
- Activity: organises the records by planned activity.
The view switcher, at the top right, only offers the views available for the current screen.
Filtering, grouping, finding again
Filters
- Click in the search bar, then on Filters.
- Select a predefined filter, or build a custom filter with your own conditions.
- Combine several filters: two filters of the same kind add up with "or", two filters of different kinds with "and".
Groupings
Click Group By and choose a criterion. The records are spread over collapsible sections carrying the subtotals. Several levels of grouping can be stacked.
Favourites
A search you have refined (filters, groupings, sort, columns) can be kept.
- Compose the search.
- Click Favorites then Save current search.
- Name the favourite.
- Tick Default filter so that it applies every time the screen is opened.
- Click Save. To share the favourite, click Edit instead: the favourite's record opens, where the Shared with field designates the beneficiaries.
In the list of favourites, your own unshared searches appear first; shared searches, whoever created them, are in a second section.
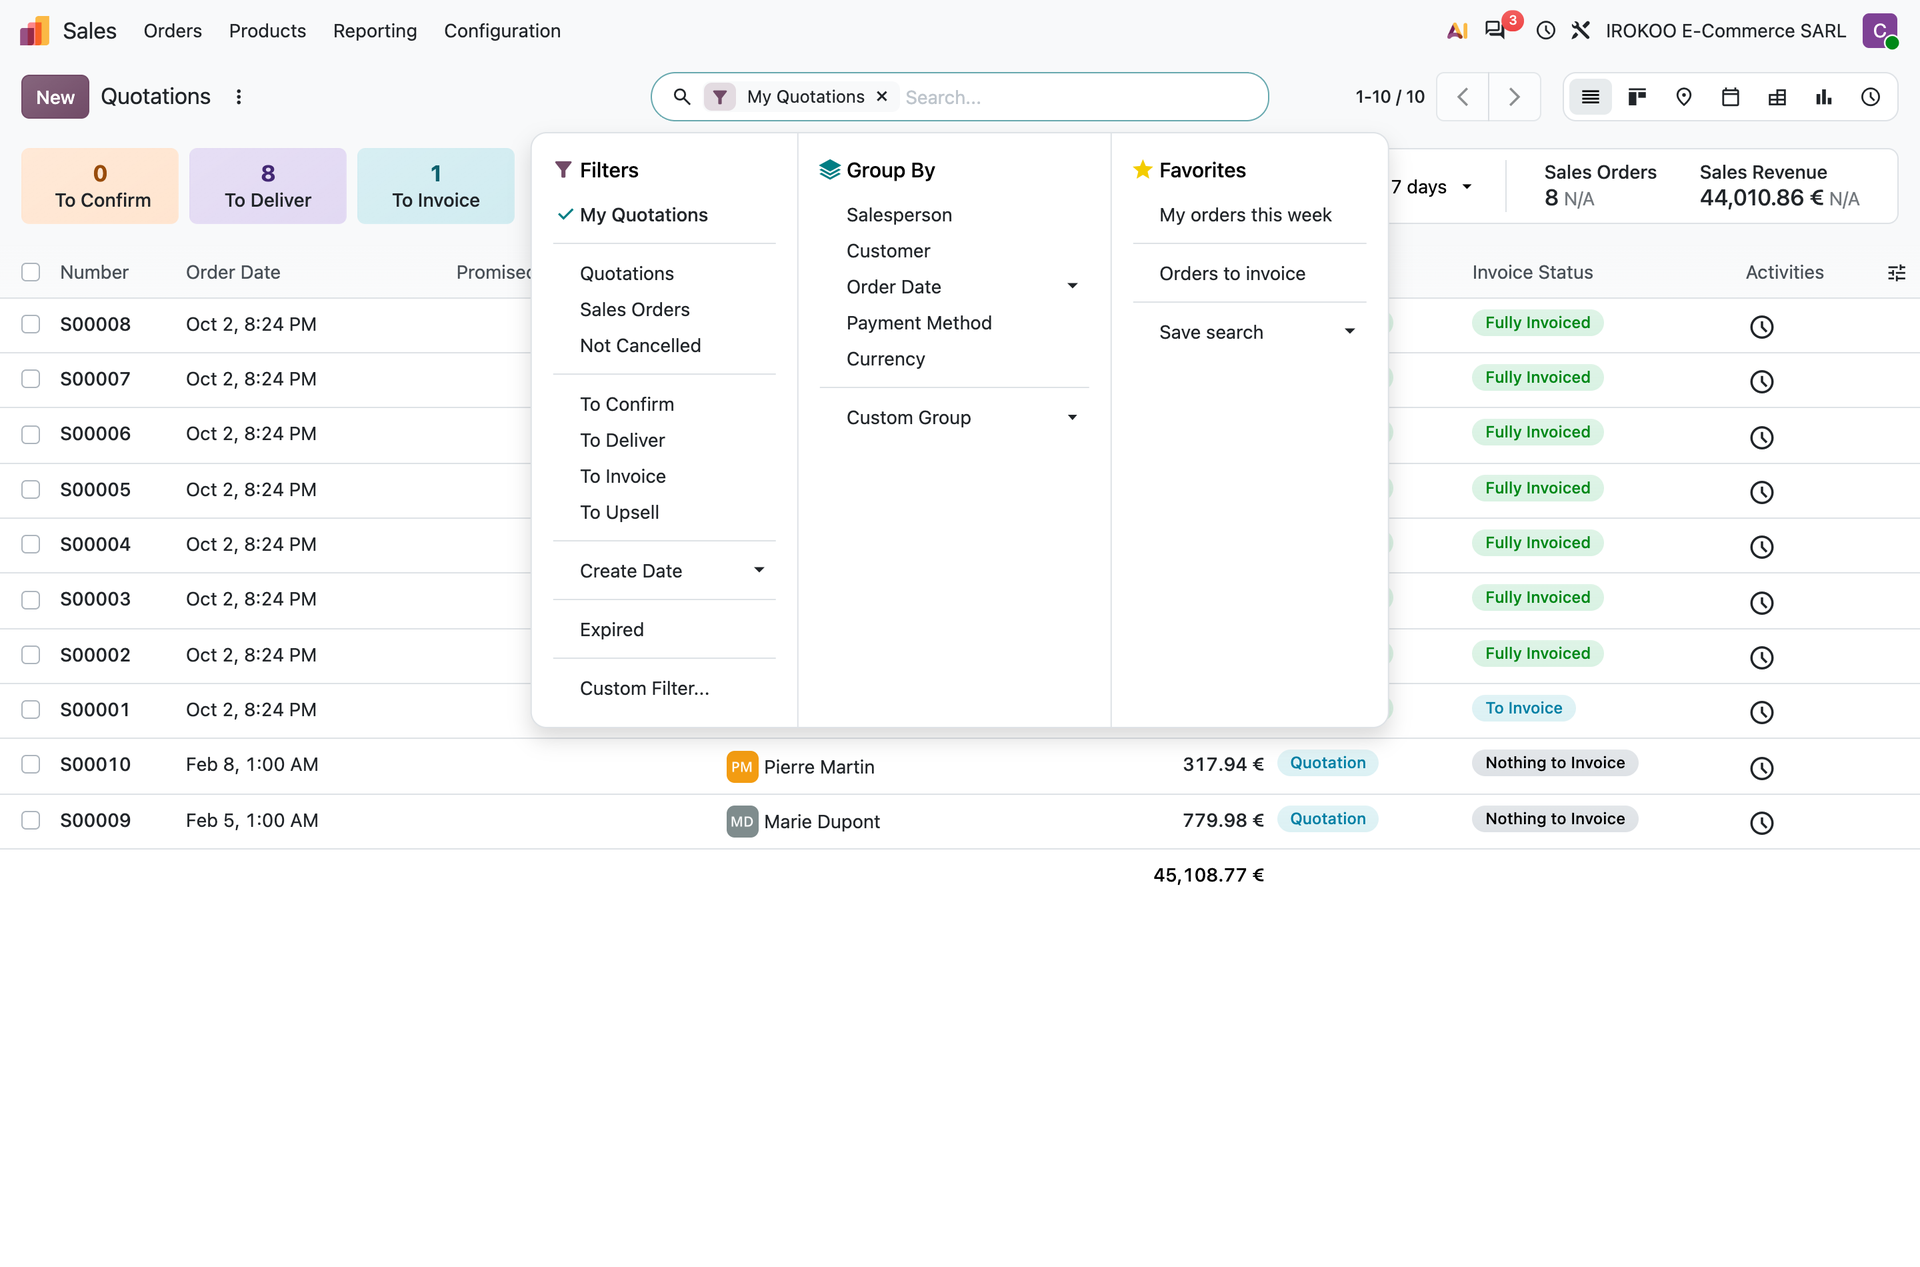
To change a favourite: hover over it in the list and click the pencil icon. The favourite's record opens, where the name, the sharing, the default status and the domain are set. Archiving and deleting are done there from the form's action menu.
Note
Adding an extra filter while a favourite is active refines the search without altering the saved favourite. To change its conditions for good, go through the pencil icon.
Comparing two periods
Comparing periods is not a gesture of the general interface: it belongs to the accounting reports, where it is the normal way of reading. A profit and loss statement is judged against the previous financial year, not on its own.
On those reports, the Comparison filter offers:
- Previous Period: the period immediately before, of the same length;
- Same Period Last Year: the matching period of the previous financial year, which neutralises the effects of seasonality;
- a custom comparison, between two chosen dates.
The report then displays the two periods side by side, with the variance as a percentage. That column only appears if the report provides for it and if a single period is being compared. The subject is covered in chapter 14.
Note
Elsewhere in Odoo (lists, pivot tables, charts) putting two periods side by side is built differently: by grouping on a date, which produces one column or one series per month, per quarter or per year. The result is the same, the manoeuvre differs (see chapter 19).
Common actions
Creating, editing, deleting
- Create: the New button at the top of the screen.
- Edit: click directly in the field to be changed, then save with the cloud icon next to the breadcrumb.
- Archive: hides the record without destroying it. It stays available through the Archived filter and can be restored.
- Delete: the Actions menu, then Delete.
Watch out
Prefer archiving to deletion. A deleted record takes with it the history attached to it, and deletion is refused as soon as an accounting document refers to it.
Importing and exporting
Every list view lets you extract the displayed records to a spreadsheet, and load records in from a file. Export assumes a selection: tick the rows, then Actions and Export. Import is started without any selection, from the round three-dot button of the search bar, with the tooltip Actions, then Import. chapter 22 covers both gestures in detail.
Personal preferences
- Click your avatar, at the top right.
- Choose My Preferences.
- Preferences tab: set the Language and the Email Signature.
- Calendar tab: set the Timezone.
- Save.
Watch out
A wrongly set time zone shifts the times displayed on activities, meetings and histories. It is the first thing to check when a user reports inconsistent times.
Help and developer mode
Documentation
The Help entry of your avatar menu opens the Odoo support page. In the settings screens, some options additionally carry a link to the documentation page that concerns them.
Enabling developer mode
Three routes lead to the same result; the third is the most convenient in practice.
Through the settings.
- Open the Settings application, General Settings pane.
- Scroll down to the Developer Tools section.
- Click Activate the developer mode. The Deactivate the developer mode option then appears in the same place.
Through the address. Add ?debug=1 at the end of the address in the browser bar, and
?debug=0 to switch it off. This route works from any screen, without going through the
settings.
Through the command palette. Open the palette with Ctrl + K, then type
debug. This is the quickest manoeuvre, and it does not cost you the screen you are on.
Tip
For anyone who switches often, the Odoo Debug browser extension adds a button to the toolbar that turns the mode on and off in one click. It is published on the Chrome Web Store and on the Firefox add-ons site, and referenced by Odoo's official documentation.
It is a third-party tool, separate from Odoo: it only reaches the browser display, but installing it falls under your organisation's IT policy.
What developer mode gives you
Once it is active, a bug-shaped icon appears in the top bar. It opens the tools corresponding to the current screen: technical name of the fields, view in use, filters, action triggered.
Administrators additionally get a technical menu in the settings, which gives access to the structure of the database, to the security rules and to the scheduled actions.
Note
Two variants exist, intended for troubleshooting: ?debug=assets reloads the interface
files uncompressed, which makes the browser's error messages readable; ?debug=tests
adds the resources needed by the test tours. They slow the display down appreciably and serve
diagnosis only.
Watch out
Developer mode exposes screens capable of changing the behaviour of the database in depth. It is switched on for the duration of a diagnosis and switched off afterwards.